Search This Blog

Wednesday, December 26, 2012

MXS Flight Test __ 60 Inches Of Awesome


Some of you might remember our last big MXS article, which was titled "MXS Flight Test __ 64 Inches Of Awesome" and are now wondering why this one is titled nearly the same, only with the wingspan shrunk to 60." For this report, we merely removed the MXS' optional "racing" wingtips, and now we have a completely different airplane, all 60" of it, that is.

The reason I am so late in following up on the original report is that while warming up to shoot video of the MXS without the tips, I flew the plane straight into the ground. It had been a beautiful flight. I was just starting to get the feel for the plane and was really digging it, and a simple snap roll just somehow went wrong and that was the end of my beautiful 60" MXS. Rest assured, the problem was all me. I just got too relaxed with the plane, got sloppy, and got dead.

Making things worse, 60" MXS sold out while I was actually at the field, so I had to wait until the next shipment. A month is a long time to be without your best plane and thinking about what you did wrong, but it was a good lesson.

The first MXS came out pretty close to perfect, which is why it hurt so much to lose it. However, the second one is even better, partially because the second production run us usually a little better after the factory learns so much from manufacturing the first one. The same is true of the build because I knew exactly what to do when I got the kit and it almost fell together for me.

Flying
As you may have read in the first flight report, the tips dampen the roll rate and generally slows the plane down a bit over all. Like this the MXS is a smooth and docile dream to fly. I am almost of the mind that it would make a nice 3D trainer this way. However, for me personally, I want my MXS' to be wild airplanes.

Without the tips the MXS comes alive. The roll rate goes up about 20%, and you'll see that in the videos when I roll it in a terminal velocity dive. If you take the tips off, be careful with the ailerons until you get used to it or you could very well over roll it. It is faster enough that all the timing is going to change on just about every maneuver. The MXS goes from a 3D trainer to a 3D beast. Roll rate is now super quick, much like the 60" Extra EXP.

 Also improved are snaps and spins. I was able to hit my snaps much cleaner like this and it was easier to make it come out exactly where I wanted it. With the tips I did not feel like I could snap it as precisely.

 Knife edge spins are almost too easy, much like they are with an Edge EXP. With the tips you have to finesse the entry, but without all you do is put the sticks at full left, full down, 1/8th left aileron, and about 20% throttle. Like this she will just fall in all by herself and KE spin beautifully. With more power the tail gets whipping around the nose pretty violently. We'll try more of those after the airframe gets scuffed up a little and becomes more eligible for abuse.


The biggest improvement was in Pop Tops. With the tips I could hardly get a full turn out of it, and I can't imagine how Daniel Holman makes it look so effortless. I tried carrying more speed, changing the timing.....everything I knew how to do, but she just didn't like Pop Topping with the tips on. Without it was a completely different story, and now does them with maybe ever greater authority than the 48" MXS, which does them rather impressively.


Without the tips I would say the 60" MXS has a perfect balance for me. With the added pitch authority I like this plane even better than the 60" Extra, which I truly love. It snaps and spins and rolls and harriers just right.
 
I  am as comfortable flying this plane as I am the 48" Extra EXP, which is really saying a lot. Obviously the bigger size makes it more smooth and solid, but the added pitch authority is something new in this size plane, and the increased agility really gives me a lot of confidence when I get it down on the deck.
 
I've said it before that I think this is the best plane ever, and I still think that.

I have not had nearly the opportunity to fly this plane as I would like, and I am really hoping to change that right after the first. I need to get out there and get some time on it before the 60" Lasers come in. We usually lose about two weeks in late January to could, wet weather, so I've got to get busy with this plane.


Workhorse Of The Year: 60" Extra EXP


While we got off to a slow start with the 60" Extra, she made up for it with a blistering summer. I tried to save the big Extra for special occasions, because I just love the thing too much. I intended to keep the wear and tear to a minimum because I wanted it to last forever. I am a bit weird for Extras, and with this one being so big and so beautiful, I didn't want to be beating it up every single day.

Of course, this had to change when I became fortunate enough to be included in the testing program for the new Torque 4016/500 Mk II motor, which meant lots of hardcore, wide open torture testing. At this point my best airplane had become expendable for the cause.

While I really did not want to wear this plane out, I think I was also reluctant to tear it up transporting it, taking it apart and reassembling it, etc. We all have a plane that we treasure, and this one is mine. Eventually I realized this was ridiculous, because I can build another one in seven or eight hours and enjoy the process anyway.


So, I just hammered the hell out of this plane all summer long. It routinely went out four to five times a week and put in six to eight flights every time. During the July break for eye surgery, I kind of lost track of how many flights we had done, but I gotta believe it was upwards of 200 or so,  maybe more....and that was just up until July. We still had All of August through October to hammer the crap out of the motor before it was approved for production.

In  the beginning this was not so hard on the motor because Florida spring is not too bad. The telling part was May through early September when temperatures would generally hover around 92-95 degrees with 90%-ish humidity. During August, stepping out my front door is like walking into a blast furnace, so you could hardly ask for a more torturous environment in which to test a new motor.


My job was to run the motor super hard and try to blow it up. This was a really good opportunity to flip to low rates and blast off some slow and point rolls, and do some big sky maneuvering. The Extra is the perfect plane for this sort of thing because it tracks like a pattern plane. I got my low rates dialed in just right for this and my precision maneuvers got much better as the program progressed.

The Extra will make you a better pilot anyway, and working on the precision aspect really tightens up your entire game. I flew pattern in the 80s, and you can't believe how much your precision game will fall apart if you don't stay on top of it. Having a good precision airframe also really helps with your 3D because it trains you to put the plane exactly where you want it to go, and to do it smoothly. Admittedly there's still a long way to go, but I think the Extra really helped me improve my flying all the way around this summer.

I took the big Extra out day after day and flew it harder and harder. This airplane was easy enough to get crazy comfortable with to begin with, but after flying it over and over I am so confident with this plane that I sometimes feel like I can set the transmitter down and will it to go where I want it to!


The 60" Extra was easily my hardest working plane in show business this summer. Generally I show a bit of reverence for the 60" class planes, but that had to go by the wayside to get the job done. I had to hammer it hard and often, and in the end, this plane turned out to make every bit as much sense as a 48" plane. There is the slight inconvenience of having to take it apart to get it into the car, but outside of that, the 60" Extra is dead solid reliable and doesn't really cost all that much more to put together.

Wear, Tear, And Restoration
Initially I intended this to be my special plane. I was going to be really nice to it and baby it and all, but it didn't work out that way, or even come close. It became an every day beater that I try to treat a little better than that.

I recently took it all apart, checked and cleaned everything, and put it back together for another year's worth of special abuse. Except for the scrapes I put on the SFGs doing slow rolls on take off, It looks like a brand new plane.
 
Oddly enough, the underside rear of the wheel pants are scraped up a bit too. In really hard tumbles and such, sometimes the wheel pants will swing down on the axles, and then they drag on the ground when you land! I just need to check the nuts that hold the axles on a little more often and keep them tight so the pants won't move around. It's just that I have gotten a little bit lazy with maintenance because the electrics require so little. It's too easy to just fly and forget about it.

Outside of that, this plane has never so much as seen a hard landing, simply because it is so easy to land. That, and I generally try to wheel land it because it does it so gracefully. She is still capable of sweet, smooth harrier landings as you can see in the videos, but it's still a lot easier on the airframe to slick it in on the mains. I like this plane so much that I never forget to take care of it and I never get careless and let it bounce off the ground.
 
You might notice the Extreme Flight decals on the wing. Those were left over from my 48" Laser EXP when I had B and E Graphix make up a special package for it. The blue was a near perfect match for the Ultrakote and it gave me a chance to try Rapic Tac decal application fluid for the first time. It's a little different and I like it.
 
 
The 60" Extra is a righteously wonderful airframe. I've hammered the crap out of it for a whole year and all it took to put if back into near new condition was a bit of Windex and a few touch ups with the trim iron.

Essentially, its just damm good airplane.


Check back soon for the build report on the red one.


Monday, December 3, 2012

Charging The Lithium Polymer Beast


Generally I try to stay away from technical articles about electric chargers and such because this is not my area of expertise. Mostly I try to keep the blog just fun, but you do have to charge your batteries and you do need to know something about it. I came into electrics knowing absolutely nothing about how brushless power systems,  Li Po batteries and chargers worked, and it's been a bit of a learning experience. Mostly I didn't bother memorizing all the formulas and math, and simply tried to learn what works in the airplane and at the field, and the following is how I have learned to do it, so far, that is.

Chargers
For years I have used the Thunder Power 610C AC/DC chargers, and those have served me really, really well. I can use either a 110V outlet, or even use my car battery to power this charger, so it is a very versatile unit.
 

 I also used the regular TP610C that was strictly a 12 volt unit. I still have two 610C AC/DC chargers, and I keep one under the seat of my car just in case I need it or one of my friends needs it. I've also got a second one I keep on the bench if I need to top a pack off real quick and don't want to go to the trouble of hooking up my more powerful system.
 
Both were reliable, hard working little chargers, but in the end they were still just that ....... comparatively little chargers without big power. For a lot of folks this is still just fine because the most common battery I see at the field is something like a 3s 2200 to 2700 mah. I can charge a 65C 2250 pack in about 12-15 minutes on a 610C, and this size battery is so inexpensive that you can almost have enough of them to fly all day anyway.

Where you need a lot of power is when you get up into charging something like a 6s 3850 pack. It takes my 610C about 1.5 hours to charge one of those, which is clearly too damm slow. I put up with that for about two days and decided it was time to get a fire breathing monster to charge those packs.

Having liked my 610Cs so much I wanted to stay with a Thunder Power charger (And so did Thunder Power!). I talked to my buddy Mark in service and he put me on to the Thunder Power TP820CD charger.


Now we are talking about a serious charger, but surprisingly the programming is very similar to the 610C, which itself is pretty easy to learn. As such, I was comfortable using this charger right away. I plugged it in without even opening the manual and understood it as soon as it lit up.
The primary difference, at least externally, is the TP820CD can charge two packs simultaneously. The difference internally is just how powerful this charger is, capable of feeding each battery a whopping 20 amps. Like this I can charge two 6s 3850 65C packs in 14-16 minutes, depending on how low the pack was beforehand. I can also charge my 4s 2700 65C packs in 12-14 minutes and 3s 2250 65C packs in about eight minutes! And remember, this is charging two packs at a time, and that includes charging different size and voltage packs at the same time.
 
Charging the packs fast like this means I don't need to take as many to the field, or even better I don't have to buy as many to begin with, which adds up when you are flying expensive 6s 3850 packs.  In fact, I now only need two of them instead of four. The difference would have more than paid for this charger.
 
Of course, there is a lot more to it than that because the charger does much more, and I am still discovering it. I just today played around with it a bit and figured out to use it to measure the internal resistance of the packs, and the good news there is that all they made it through the hot summer still in really good shape.
 
So, while I am still learning about this charger I am definitely loving it more and more.
 
The Solid Hobby Power Supply 
Initially I was powering my TP820Cd with a Feathermerchant 24 volt power supply, and it served me extremely well. It's a really good unit, though I have often wished it only needed one power outlet (instead of two) to operate. When I saw that Solid Hobby was manufacturing a Y-harness complete with on/off switch, I had to get one. I liked the unit a lot, except there was an awful lot of wire there. I suggested to Jeremy at Solid Hobby that the two cords coming out of the power supply be shortened, and then the switch could be velcroed to the top of the power supply. Jeremy swapped out my unit for the improved one at no charge, so I was pretty pleased with how I was treated. I believe all the switches now come this way.


Now I only needed to take up one outlet, and with the switch I wasn't having to unplug it every time I was finished. This new arrangement also tidied up all the wiring and made the whole thing much neater, which is exactly how I like things.
 
Later when talking to Jeremy via PM at RC Groups, he mentioned he would be manufacturing a 24 volt power supply, and incorporating a few improvements.  As pleased as I was with the other product, I knew I was going to want one of the The Power24+ supplies too.
 
Unpacking the The Power24+ today I was delighted to see how nice the thing is. Ok, I get it that no one goes to the field and says "Damm, you got a pretty power supply," but the truth is this thing looks real nice. It is a very well finished product. Initially I thought they had made an outer case, but later found out that each one is individually hand covered with black Ultrakote!


It did not take long to realize this charger was built for married men. My wife noticed right away the unit has little rubber feet on the bottom, and she remarked it's nice the thing won't scratch the kitchen counter! While that's practical enough, it is also nice this could keep the thing from sliding off the work bench. It also gets it up off the ground enough that it is much easier to get your hands around it to pick it up. This might seem insignificant until you get arthritis in your hands, and then it is a bit of a godsend.
 
Upon firing the unit up I could hear right away how much quieter it is. This will come in handy for guys who have to charge inside the house and don't dare disturb the Wifey's TV time. The fans also run at slower speed until more cooling is needed, and then they crank up.
 
Having been around racing and model airplane engines all my life, I have a bit of hearing loss. When there are too many noises everything seems to turn to mush, Around the field with the traffic and other noise, the cooling fans on a power supply make having a conversation around my pit very difficult for me. With this new unit I am sure that will become a lot easier.
 

As you can see, there are dual outputs, meaning you can use two chargers. In this picture, you will use the black outputs and the red outputs on the very left to run the power system as a 12 volt unit.

 
Here you can see the red jumper wire used to hook the two power units together and make a 24 volt supply. This is the way I will be running it with my TP820CD. Also note in the above pic the nice little shields over the cooling fan intakes. Every so often I accidentally stick one of my fingers in the fan on my other power supply while it is running, but you can't do that on this unit.

So far I have charged a few packs getting ready for tomorrow, but the real test for this power supply will be in the field. So far I am really pleased with it and look forward to seeing what she's got tomorrow.

Units will be going into production shortly. List price will be $110 for the power supply including the on/off switch + $15 for US shipping, so the total out of pocket will be $125.

 Also worth noting is that the Power24+ system comes with a one year replacement warranty, so you'll be making a safe investment in powering your models.

Sunday, November 25, 2012

Flying The Extra EXP With MXS Wingtips


After flying the new 64" Extreme Flight MXS EXP with it's fabulously built racing wingtips, I wondered what effect those style of tips would have on a smaller 48" plane. They had a taming effect on the big MXS, dampening the roll rate and sensitivity a little  and turning the plane more docile. It was super groovy and tracked like a laser beam this way, being smoother and much more reassuring to fly. The effect was almost like turning the MXS into a 3D trainer. They look so super cool, though I like my MXS' to be a bit wilder, and I preferred the big plane without them.

However, this dampening effect might be a really good thing on a 48" plane. The bigger planes are always going to be smoother, more precise and more solid, but I was hoping maybe the tips could bring the smaller planes a little closer in that respect. As always, with the Extra EXP being my go-to plane, it would be perfect for this sort of experimentation.

I had several sets of the smaller fiberglass tips left over from previous 48" MXS, so I snagged a set from my parts box. The blue on the MXS tips is much darker than the Extra EXP blue, so initially I just shot them in white Kyrlon primer and paint. Like this they sort of looked like they were stuck on as an afterthought. I stopped by a local graphics store to pick up some decal solution and while I was there asked about vinyl sheet material. They have some blue which was a perfect match for the Extra.


I used the wingtip itself to trace the shape onto the vinyl and simply cut it out. Believe it or not, the shape of the outside edge and the inside edge are both traced from the wingtip. It's some sort of weird optical illusion that makes them look like different shapes.


I think the tips really add some zing to the Extra's appearance, but I've always loved the way this plane looks anyway. I'm not quite so sure about the color pattern I devised for the tip, and I will keep tinkering until I get it just the way I want it.  The Vinyl is so easy to work with that I can peel and stick and peel and stick until I get it just right. The raw vinyl is also really inexpensive, so I'll probably be working with it a lot in the future.


FLYING

As always everything revolves around the flying. The short answer is that the tips have much the same effect on the 48" Extra as they do on the 64" MXS, though it is much less pronounced.  Too much taming down of the extra would not have been good because I already love the way the plane flies.
 
However, like I suspected, the tips actually improved the areas where the Extra is already king, and that's in high speed tracking and precision maneuvers. The Extra already drew really clean lines but now it seems more locked in and solid. This has encouraged me to start using my low rates for slow, point and consecutive rolls, and now the plane reminds me of how my old Curare AMA pattern plane tracked and grooved. Precision is otherwise improved because you can't beat a groovy plane for that kind of work.
 
Of course, the roll rate is slowed a little, but it was so fast before that I could not keep up with it anyway. It's still really quick. Unaffected is aileron authority in a hover. I was afraid there would not be enough to counter torque, though this concern turned out to be unfounded. For 3D the plane is not effected so much. It appears to me that at stall and near stall speeds that the tips really don't affect too much and I can 3D the Extra pretty much like before.
 
The only downside of the tips is that they slow down snap rolls and they are not quite as crisp. I have gotten some of this back by adapting my style a little so this isn't a real big sacrifice. If you want to go out and have a big day of tumbling you take the MXS.

The Extra has always had a bad ass knife edge spin, and this only changes a little with the tips. Once you get it in the thing will whip the tail over the nose just like before, but the entry timing is a little different and I am still trying to master it.

For high energy moves like the pop top and such, the tips seem to sap a little of that energy, but if you manage your speed just right the plane is still very capable.
 
Mostly for snapping, spinning, tumbling kind of moves, the plane is tamed a bit and the timing of the move changes a little. If I hit a snap just right it doesn't seem like the tips have any negative effect. Like I say, the timing just changes.
 
I think in the end the tips will be a personal preference type of thing. If you lean more towards precision you will like the effect, but if you want to snap and spin and tumble the tips probably won't be your favorite accessory.
 
I have the massive luxury of having more than one Extra EXP, so I fly the blue one with the tips and I have a newer red that I fly without. For now I am using the blue to help me improve the precision part of my game, and I'll go back to the red when I want my Extra to fly a little wilder.
 
Overall, the Extra EXP is still my favorite airplane ever. The tips are just a nice little diversion to help keep the experience fresh and new, and something cool to share with everyone.

I've flown a lot of different EXP airfames lately in both 48" and 60," and while they are all really cool, it seems like the 48" Extra is always the one I want to fly. Extras might seem a little unfashionable lately with MXS and Lasers and all being the rage, but it's still one of the finest airframes you can get your hands on. Everybody's style is a little different, but I think the Extra plays to mine the best, and this is also the plane that inspires me to raise my game.


Video:
As you can see above, we can't get a break with the weather, so we shot the video in horrendous winds. Early december is usually beautiful flying weather in Florida, so we'll try to shoot a really good oe soon and put in things like the KE spin and other maneuvers we covered in the text on this article.


Monday, November 5, 2012

Working With Vinyl Graphics


There are a few different ways to go for putting vinyl graphics on your plane, but for the purposes of this article we're going to talk about the two most popular.

Note: To avoid confusion between the two types of decals, from this point on in the article we will refer to the single piece sheet decals that come with the kits as "kit decals" and B and E high quality "air release" type of decals as simply "decals." There are also two different ways to apply both types of decals, and we will also get into that later in the article.

"Kit Decals"
First are the decals that come with most of the kits. They are printed on a single sheet of clear vinyl, and you have to cut each one out, peel off the backing and stick it down. They are extremely grippy and unless you use a decal solution they are very difficult to position. You can forget about sliding them on because they simply stick too vociferously. Since on any text part of the decal there is clear vinyl between each letter, that's a lot of area to trap air under. To get good results with this type of decal, you just about have to use a decal solution.

Generally I don't like these decals because it is a lot of work to cut them all out, they are hard to work with and they don't look nearly as good as the next type of decal were will be talking about. They still work, and since they come with the kit it makes sense to use them and save the money, provided you are not so super picky and critical as I am.

High Quality Air release Vinyl Decals.
Lately I have been using a lot of high quality vinyl "decals" from B and E Graphix. They now use the "air release" type of vinyl which has little air channels on the back side of the decal. These allow air to be pushed toward the edge of the decal and out. Sometimes the air will escape on it's own if you just let the thing sit for an hour or so. This makes air bubbles under the decal pretty close to a thing of the past.


Applying this kind of decal is also easier because, for one, it is much more forgiving to work with. It you get a decal a little crooked you can get it back up if you are careful. This is much easier than when working with the other type of decal which is so grippy you have no chance to slide it around and adjust it.

On these types of decals you have a backing, of course, but also there is a piece of backing on the front of the covering. This is called "application tape." The reason for this additional piece of tape is because each letter in a text decal is it's own separate piece of vinyl with no clear material between those letters. For instance, on an "Extreme Flight" decal, the "E" and the "X" and the "T" and all the rest of the letters are all separate pieces of vinyl. The application tape simply keeps all the letters aligned until you can get them down, and then you peel the outer piece of application tape off, and you are done.

There are two ways to apply these type of decals. One way is simply peel and stick and then peel off the outer application tape. The other is to use decal solvent, which we will cover later. For now we are just going to peel and stick.

Perhaps a little too confusing to explain in words when pictures work so well, so here are some pictures. As you can see at the top of the picture, the decals still come on one sheet, or in the case of the laser, because there are so many decals, two sheets. Here I have the SFG all cleaned off with lacquer thinner (removes any covering glue residue) and an SFG decal cut from the main sheet.


Below I have peeled the backing partially off so you can see what it looks like and how the three layers are put together.


Now you simply align it and lay it on the SFG. Rub it down and we are almost done.


Now you can clearly see how the application tape does it's job in keeping all the separate pieces aligned for, well ..... application. You just peel it off. It is helpful to peel the tape off in a direction parallel to the surface. This helps you not pull the decal back off or pull the covering from the wood.


And now, the finished SFG.


Application Fluid
Previously I was using Windex for my" kit decals," but I have since learned that the ammonia attacks and dissolves the decal glue and makes the edges not stick quite so well. "Rapic Tac" application fluid works so much better because it is inert toward the glue, and it also seems to allow air to escape better, especially when working with "kit" decals.

For the rest of my new Laser I used "Rapid Tac" decal application fluid. B and E sells this, but you can also get it at most graphix stores. It is really good stuff and makes the job a lot easier, especially on the Laser.  The whole idea of application fluid is to allow you to slide the decal around until you get it where you want it, and then squeegie the fluid and air out so the decal will stick.

According to the B and E web page: Using Rapid Tac Application fluid can often allow a large graphic to be installed with one person where two people were required to perform the same installation dry. Rapid Tac Application Fluid also cleans the surface without leaving residues ensuring a contaminant free installation. It then helps to -float- the vinyl film until it is properly positioned.

Also on the B and e web page are instructions for using Rapid Tac.


I found all of this to be true. The stuff works really, really well and gives you are very nicely finished plane.

Previously, for my high quality decals I just peeled and stuck them because none of them were really big and perfect alignment was not super crucial. The Laser, however, is such a special plane for me that everything on it had to be absolutely micrometer perfect.  The laser has long stripes and stars, and near perfect alignment is critical to get an great looking replica of Leo Loudenslager's awesome plane.

Of course, I had B and E cut me up a set of beautiful air release decals. It was putting them on that was going to be a bit tricky. I built one Laser just peeling and sticking the long stripes, and while it came out well, it was a huge amount of work and stress getting it all aligned perfectly, though admittedly, the stress was only bad because this plane means so much to me.

For this Laser, I went with Rapic Tac and it was a whole new world of easy. You can use all the Rapid Tac you want because it does not effect the glue. You can wet down the plane and the back of the decal too and it makes no difference except making it all easier to slide around.

Unfortunately my camera started acting all crazy halfway through this project, so I did not get all the photos I wanted. For now, here is a picture of the soft plastic squeegee I got at the graphics store, though I believe B and E has them too.


What you do is peel off the backing tape and then spray the area you want to apply the decal to with Rapic Tac. Position the decal by sliding it around on the plane until you get it where you want it. Then squeegee the fluid and air bubbles out from under the decal. On the Laser this was especially helpful to be able to slide the decal onto position because alignment was so critical to get a great looking plane.

Not wanting to screw up an expensive decal set I experimented on a wrecked wing using standard kit decals. Rapid Tac is especially essential with those type of decals because they are so grippy that you can almost never get them straight and with no bubbles. With Rapid Tac they just slide into place where you want them and then you squeegee out the fluid and air. It makes for a much better looking kit decal, but it is still not as good as high quality vinyl decals.

I wasn't able to get any pictures of the Laser decal application but I will take some when I get a new camera and edit the article. However, as you can see, with the long, flowing stripes the decals have to be perfect for the plane to look good. Using the air release vinyl decals and Rapid Tac, I would get one end of the stripe positioned and hold it in place while I slid the other end where I wanted it.


Once you have built so many planes and applied so many stickers and such you develop an eye for getting things straight. Being able to slide the decal exactly where you want it makes things so much easier, whether it is a standard kit decal or high quality air release graphics.

I do plan to build one more Laser for now, and hopefully those will live long enough that I won't have to build any more, at least for awhile. With the 60" Laser coming up I need to keep the build table free of any left over projects. I am sure for that plane I will also use a set of B and E air release graphics, just because it has to be perfect too.


Wednesday, October 3, 2012

Laser EXP Celebration

 
100 Flights?
Or so.  I've had such a great time with this plane that I sort of forgot to count.  As seen in Extreme Flight Laser__25 Raging Flights it did not take me very long to fall in love with how this plane flies.
 
From what I can tell, the Laser shares the same wing platform as the Extra EXP. I also held my Laser EXP over top of my Extra EXP and it seems the tail moment is fairly close to the same distance,  so it was not a big surprise that the Laser EXP flies a lot like the Extra EXP in a lot of ways.
 
Considering how much I love the Extra EXP, that's the highest praise I can give a plane. However, some flying characteristics have been improved.
 
Pitch Authority
Right away, I could tell that, comparing to the Extra EXP, there is a big difference in the pitch authority. I sort of suspected this could be the case because the Laser has a larger elevator, much like the one on the MXS.
 
The Laser is very nearly as good here as the MXS, and it is certainly enough. The laser will pop up into a wall effortlessly from almost any speed, and you have to be careful to remember it isn't going to balloon up like the Extra will. The Laser doesn't quite throw the tail under the plane and start sinking like the MXS does when you throw it into a wall, but it's pretty close.
 
For parachutes, the laser is really sweet. The plane will rotate to level with a very satisfying "pop" and settle into a high speed elevator while it bleeds off speed. If you hold it like this you can add a little power and start moving it forward into a harrier, which this plane does nicely as well.


Harrier
The Laser harriers extremely well. It is almost as good as the Edge, which is as good as it gets. You can get it to rock a little if you are sloppy enough, but it is never enough to make the plane wallow off course. With just a little care the Laser harriers with the nose way up there and tracking straight.

I consider the elevator maneuver to be a harrier of sorts that is not moving forward, because you fly them essentially the same, except for the moving forward part, that is. The Laser does a really pretty elevator maneuver with very little correction. Again, not as completely foolproof and effortless as the Edge EXP, but not very far off either.


 Precision
Here the Laser is very close to the precision king, the Extra EXP. She tracks extremely well, making slow and point rolls very straight and pretty. However, with the big elevator the Laser gives up a little pitch stability to the Extra, but it is not horrible or anything. The Laser is still very, very solid at high speed, just not as absolutely locked in as the Extra.

To get around this, I fly my precision works on low rate and that works very well. It is a small price to pay for the additional pitch authority I like to use in my 3D works. I should really be using rates anyway, but the Extra is so solid on high rates it has made me lazy.
  
Snaps, Spins, And Tumbles
And here's where we get to the Laser's really strong suit. Snaps are very clean and spins are tight. It is very much like the Extra here, which is again the highest form of praise, but when you get into the KE spin, it becomes a different game.
 
All you have to do with the Laser is put in the right commands and hold it there. Then it is almost like the Laser has a KE spin autopilot, and it just drops right in. I don't really do a lot of KE spins with the  Laser because they are too easy, but it sure does them pretty.
 
Pop tops are crazy and I can get two full turns out of one. The times I hit it a little sloppy the Laser will blow out tail first and then squirt across the sky backwards. It's the strangest looking thing. You can see it at about 1:40 in the first video on this page. In the second one I simply put the sticks in the KE spin position mid maneuver and she drops right in. Too easy.


Generally Speaking
When I fly the Laser, I just fly it. It is very much like the Extra EXP in that it does exactly what I ask from it with absolutely no fuss. It's as close to a point and shoot kind of plane as I have ever flown.
 
The Laser does seem to fly like a conglomeration of all the other EXPs put together, but considering how well all of them fly, and how each of them has their shining strengths, this makes for an extremely well rounded airplane. Again, it is much like the extra EXP in this respect. It has very well rounded performance. The difference between the two is the Extra, while being a great freestyle sort of plane, is biased more toward precision, and the Laser, while still very precise, tends to favor being flown in a more freestyle sort of way.
 
Perhaps as much as I have compared it to the Extra EXP it is fitting that the Laser gets the same kind of unconditional approval  that I reserve for planes like the Extra EXP.
 
Graphix And Such 

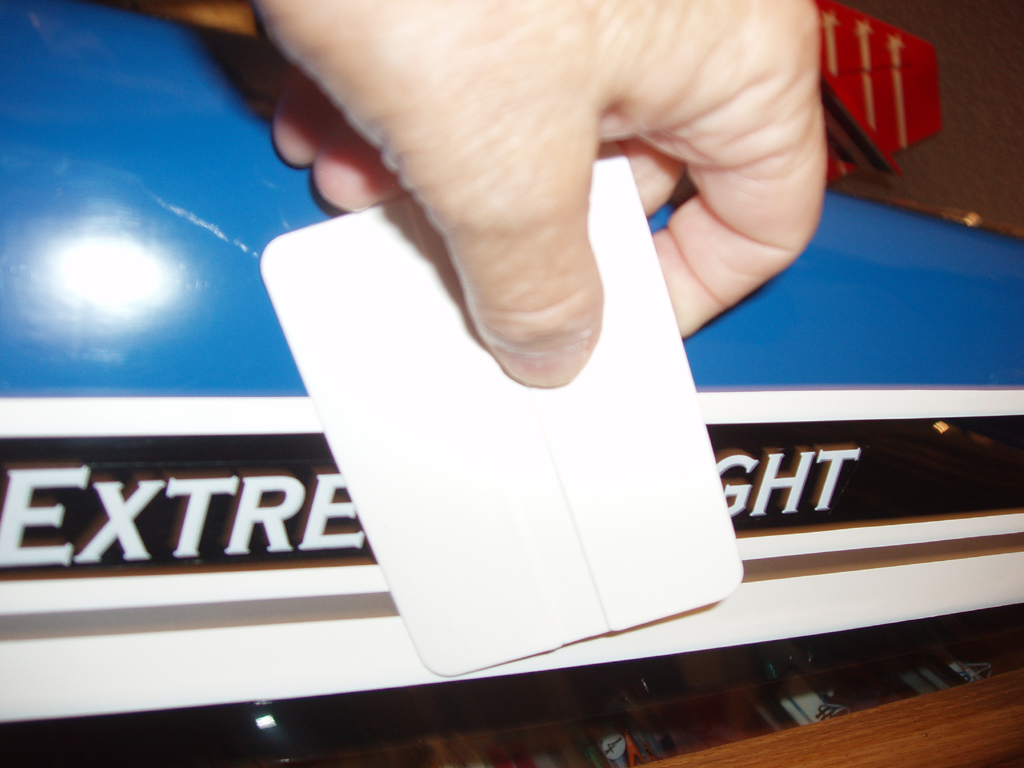
It took a little while to get my Laser EXP fully finished. I think I was just so stressed out about doing a perfect job on the decals that I kept putting it off. Of course, this is a bit ridiculous because I ordered a set from B and E Graphix, and those are air release vinyl with application tape. I've been using those for years for my Thunder Power and Extreme Flight decals and they go on very easily
 
Still, I was too stressed out to do it, simply because the Laser is such an important plane for me. Finally my friend Ken Elder put them on for me and it came out really nice. As you can see, he did a beautiful job on it.  
 

The Laser And Me
 
The story of the Laser 200 and myself is over 30 years old. In 1980, Leo Loudenslager won the world aerobatics championship with his own design, the Laser 200, which was a development of the Stevens Acro.  Leo obviously then became my instant hero, and the Laser 200 was a plane that I would have to have.
 
Of course, back then, everything was built from a kit..... a real kit which was nothing more than sheets and sticks of wood that you had to glue together, sand and cover with Monokote. For some odd reason, no one built a decent Laser except Bob Godfrey. His was damm nice, but it was a 1/4 version and a the bare airframe less covering went for around $1200.... and that was in 1980 dollars, which was real money.
 
I wanted a laser so bad that I couldn't stand it. In desperation I tried a host of other scale aerobatic planes like Caps, Zlins, and El Diablo and all that, and I even considered a Dalotel, though that plane was so ugly I would have rather gouged out my own eyes with a rusty spoon. Finally, I was sick of racing, and I was sick of pattern competition, and the last thing in the world I wanted to look at was another Ugly Stick. Well, that or a Dalotel.
 
So, in 1988, bored with all the ugly and unappealing planes out there, I quit flying and took a job as a scuba dive guide.
 
In 2005 I got another plane. At first I just wanted to fly my foam RTF in the park, but going online I saw what incredible things were being done with electric scale aerobatic planes. The Edge 540 looked sort of like a Laser, and I went through a succession of those, and later Extras, Velox', and a Yak or two.  It's really been a blast flying such interesting and good looking planes, but I never gave up hope that someone would build a nice Laser, especially in an affordable 48" size.  


Team Extreme Flight
All the while I kept eyeing those large Extreme Flight planes, and I even had some of the 45" Extras and Edges. I loved those planes and I also really dug the Extreme Flight Radio Control Aerobatic Team logo. I was really jealous of those guys who got to wear that on their backs. 

So, I always had this sort of  impossible little day dream about being on Team Extreme Flight. Why not dream big and be on the best team in the industry, fly the best planes going, and wear the coolest logo ever?  Actually, it seemed so impossible that I dreamed it once, and then put it out of my mind, because it could simply never happen. I may as well have dreamed of having an affair with Megan Fox or Jennifer Love Hewitt before something ridiculous like Team Extreme Flight  choosing me would happen.
 
 
And then, the impossible actually happened. I was put on Team Extreme Flight. It's been a year and a half and I still can't put it into words how much that means to me.
 
Now the only thing missing in my modelling world was a really nice Laser. With the full scale plane now over 30 years old, it did not seem likely that anyone would actually produce one, but then again, I was starting to believe in the impossible.  

Six months into my dream come true, Extreme Flight principle Chris Hinson sends me photos of the then-secret 48" Laser EXP.
 
And I flip out. Another dream come true.
 
 
 So, with all of this in mind, perhaps I can be forgiven for writing a slightly out of whack article. After all,  having to wait 30 years for my dream airplane, and then getting to fly it for my dream team, wouldn't it seem a little odd if I wasn't completely disjointed over it? 
 
 Laser Desktop Artwork
 
It's still a bit early in the Laser story, so we don't have a lot of artwork made up just yet. For you Laser fans who want a cool Laser desktop, click on the picture to make it go large, then right click and choose "save as."


Saturday, September 8, 2012

MXS Flight Test __ 64 Inches Of Awesome

  
 Having had Extras, Edges and Yaks in a multitude of sizes, one constant I have noticed it that as you go bigger the planes become smoother to fly, more precise, and they feel more solid and sure footed. Having until now  flown an MXS EXP only in a 48" span, I could only guess this would hold true of the 60" MXS, but this time it was surprising just how much more smooth, precise, solid and sure footed it is.
 
Right now my MXS has a lucky 13 flights on it. Four of those were the first day out when my eyes were giving me a lot of trouble, so it is hard to count those. The rest were yesterday and with each pack I would run through the plane my confidence would swell. I thought I knew what to expect from the MXS, but it has already far surpassed that.
 
This is by far the best flying plane I have ever owned. I will have to fly it back to back with the 60" Extra to get a clearer picture, but I think for my style of flying the big MXS rocks.
 
The difference Is in The Tips.
Again, this is another case where a review gets a little weird.  The MXS comes with beautifully made racing wingtips. They are really works of art, and they do make a substantial difference in how the airplane files. As such, this report will center on flying the plane with the tips installed, and the next report will be on flying the MXS without them.
 
The beautifully made racing wing tips offered their share of surprises. A fiberglas version of these come with the 48" MXS, but I didn't find those to affect the flight characteristics all that much. As such, I did not expect the bigger ones to do much either, but I could not have been more wrong.  On the 60" MXS, removing the tips turned it into a completely different airplane.
 
OK, color me surprised. I figured they were cute little cosmetic pieces, but they are really very functional. The wingtips dampen the roll rate, slow down snap rolls, tumbles, pop tops, and the plane is more reluctant to go into a knife edge (KE) spin. In this configuration, the 60" MXS was actually tamer than I was expecting it to be. It is more like a big, easy, floaty 3D trainer.
 
You can see in our first two videos how incredibly locked in the plane is, and how docile and predicatable it is.  For the first few flights this was a good thing because I really didn't need to wreck it. Being so stable allowed me to push it really hard without the fear it was going to get away from me, but the price is the MXS signature wildness has also been dampened a bit, though even like this, it is still a damm nice airplane and still very capable.
 
I did make one flight using the SFGs and no wing tips, and like this the 60" MXS was much more like it's smaller sibling.  The roll rate probably increased about 40%.... it was startling, though not uncomfortable. It was just a surprise that it made that much difference.  I could get a full two to two and a half turns on a pop top, snaps were more violent and crisp, and KE spins were much easier,  requiring less attention to entry and form. It just goes in real easy without a lot of fuss, and locks right in effortlessly, whereas with the wingtips in place it requires a lot more finesse.
 
OK, I don't want this to sound like it is a bad thing, because quite the opposite, it's not. The wingtips actually serve a very useful purpose, and that is taming the MXS down to the point that almost any intermediate sport pilot would find it easy to handle.  If you want a tamer MXS, put the tips on. If you want to go ballistic and fly a wild MXS, take them off.
 
Removing the tips makes the MXS into a much more aggressive performer, and I think that is eventually the way I will prefer to fly it. For now, though, I had already flown it with the tips so much that I figured this would be the best way to shoot the video, and next time out I can get used to it without the tips for a few flights and shoot some more. I think the differences will be very interesting. 


In general the big MXS is much like the small one, but in this configuration is is so smooth and forgiving that you could almost use it as a 3D trainer. It is surprisingly easy like this, even with the big throws I am running. The one thing that kept happening over and over was my being surprised at how gentle the plane is to fly.
 
But it's still pretty agile. As you can see in the videos, pitch authority is nearly as strong as on the little one. The one thing I would have liked more of on the 60" Extra EXP was pitch authority, and on the MXS it seems just about right to me. It will stand up real nice in a wall, and pop to nearly dead flat in a parachute. As you can see in the video, it also does a real nice elevator manuever, but you can also see it moving forward a bit too, so I am still probably a bit nose heavy.
 
Dialing It In
Once I can move the CG back maybe another 1/8" to 1/4", I think the agility will really come in and those elevator maneuvers will fall straight down. I'm still getting it dialed in, but I am also moving slowly and cautiously because this is a brand new design that I have no previous experience with.
 
So far the plane has responded exactly like I was expecting with every adjustment. That's the mark of a good design.... it responds predictably to sound engineering and set up work. It's the crappy designs that bite you when you go the wrong way on set up. A good plane will give you signs where you are going wrong, but won't freak and and spin into the ground if you miss the set up a little.
 
With this being such a comparatively large and expensive plane, plus the fact I love it so much, I am trying not to get too confident with it too quickly. The problem is that the plane is so good that this is becoming impossible and I am starting to think that with the 60" MXS I am invincible.

Extreme Flight MXS 60__Sunset Huck Part 2 from Doc Austin on Vimeo.