Search This Blog

Sunday, January 9, 2022

48" MXS V2__Bad Attitude Flight Testing

Life kind of got in the way and I couldn't get the text for the flight review finished until now.

Having flown the 48" MXS for over a decade, this V2 was a much anticipated plane for me. I had fallen in love with my 60" V2 the instant I opened the box, and the 48" was much the same thing. 

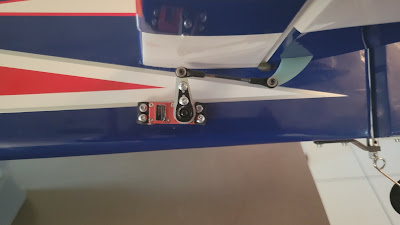
With V2 construction the planes are now much more durable and the fit and finish of everything is better than stellar.  V2 construction also gives you a stiffer airframe, one that doesn't flex under load. You can tell the V2 stays straight and aligned the moment you turn after take-off. The airframe is largely unchanged externally, but the stiffer construction makes a big difference you can feel right away.


48 MXS V2__Bad Attitude 2022 003 from Doc Austin on Vimeo.

The V1 and V2s fly essentially the same except the V2 does everything a little better simply because it is more refined. Add to that better precision thanks to the increased stiffness and you've got a better airplane.

The best way to sum up the MXS is that it is a lot like you would expect from a short coupled Extra. The MXS is much more lively, though it surrenders a little to the Extra in precision flying. These two are very similar, except the Extra is biased a little more toward smooth, precise flying and the MXS is tailored more toward better agility and more violent snapping.

For 3D, the MXS' short coupling gives you better control authority. You can spin the MXS around in a tighter harrier turn, so this is a great plane for smaller fields. Harrier manners are very, very good, but you can see that in the video. Overall, while similar to the Extra, the MXS is still different enough in flying manners that both are worth having. They are just biased a little one way or the other on the precision vrs agility scale.

While different, I fly them relatively the same. The MXS is stronger than the Extra in some maneuvers and the opposite is true in others.

Overall, I think the MXS is a good second 3D aircraft. It's a very stable plane, but the level of agility is maybe a bit too much to be learning 3D on. Most people like the Edge for 3D training, but once you get past that most pilots will find the MXS' agility to be useful and even amusing. If you are already flying an Extra, you can jump into an MXS and feel pretty much at home right away.


It's a little more challenging to deal with all of that agility, but you can easily get around that with set up. For example, I only have two raters on my radio anyway, so I use the 3D and low rates from the manual. I completely discarded the "insane" rate because it's not really necessary and the plane overall flies better on the 3D rate.

Of the 3 currently available 48s, I would rate the Edge as the best plane for people learning 3D, but it still does very crisp precision.  The Extra for most precise plane in the lineup, but still 3Ds extremely well. The MSX is for those who want the no compromises, hardcore king of badass. 

Finally, the only way to really judge a plane is in how much fun you have with it, and the MXS has always delivered on that front. The MXS has always been a really special plan for me and now it is much, much nicer all the way around, and flies better too.


Tuesday, January 4, 2022

Extreme Flight 48" MXS V2__Bad Attitude 2022


The 48"MXS has been such an incredible plane for so long it really hurt when we couldn't get them any more. The 60" V2 sort of made up for it because that plane is so spectacular, but I missed having a smaller grab-n-go version. The news that a 48" V2 was on it's way really excited me. I have most of the equipment on hand, so all that was left was the agonizing wait, and now that's finally over.

With the arrival of the MXS V2, the 48" class is really hopping again. There was a lot of excitement last year with the Extra V2 and Edge V2, and now the MXS makes three brand new V2 entries into the class. There might even be more coming, so things look pretty sweet for the four footers.


These V2 airframes are such a big jump in performance and stability that they changed the game. The V2s make extensive use of carbon, G10 mixed composites, and advanced construction, to lay a great foundation to build the new MXS V2 on.  What you are seeing in this new MXS is what was learned from 10 years of flying the plane, coupled with the latest composites and advanced construction. It gives you a stronger, better flying and more durable plane, which is especially important the way we treat them!
Personally, the MXS has always been a special plane for me. The V2 is just more special, but we'll get more into that in the flight report. We will take some photos of the plane out in the sun when we go to the field. Right now, we have nasty winds and no camera guys, so hopefully tomorrow.


Another improvement is the bottom of the stab now matches the checkerboard on the wing. The asymmetry of this on the V1 always made me a little crazy, probably from OCD, but now it's perfect. 


The Kit
As has become the norm with the other 48" V2s, the quality of the kits is now bonkers. Everything is beautifully finished and fits perfectly with no tinkering. The composites are so beautifully done it just sets everything off. The wow factor is amazing. 

Previously, the 60" planes were a bit nicer. Maybe it was the size or something, but they always seemed a little better turned out. That has now disappeared and these V2s are as serious as it gets, especially if you go for premium servos and a good electronic stability system.

The most obvious of the changes is going to be the extensive use of carbon and G10 mixed composite construction. There are times when only carbon will do, like landing gear supports, or other rods and tubes. However, for things like formers black G10 laminate is nearly as strong, nearly as light and much less expensive. The G10 laminates are so strong that you don't need a lot of carbon just for that sake of having carbon. Each material has it's own use, and applying G10 where it is most effective is a great way to cut costs while still having composites that will do the job and look cool too.

The MXS  comes with the same wing quick latch as seen on the other V2s, which is nice if you have to take the wings off for transport. I generally leave the wings on mine except when I am doing maintenance, and then it's nice I don't have to fight with wing bolts. Those of you with arthritis will especially appreciate that part.

Motorbox
As seen on earlier 60" planes, and more lately the other 48" V2s,  gone are the carbon support rods replaced by angled motor box construction. This gives you just as stiff of a motorbox, but the angled sides become wider as you move back, and this allows much better access to the battery and easier change out.


Wing Lock System
As is becoming the norm with the newest Extreme Flight releases, the MXS features a quick release wing attachment mechanism. You slide the wing on and move the latch forward, which captures the wing bolt. The mechanism is spring loaded, so it locks solidly into place. Naturally, after years of using other methods, I was a little skeptical, but we've been using this system for two years now with great results. 

Locked and ready to fly......


In the first picture you can see the latch open. In the second the wing is on with the wing bolt sticking through, not yet latched firmly.


I never took the wings off my 48s for anything but maintenance anyway because the plane would fit in the trunk assembled, but I know a lot of guys take multiple planes, and quick assembly/disassembly makes these 48s even more convenient than they already were.


Self Aligning stabilizer Installation
Here's what I think it the most underrated innovation of the last decade. I always hated putting the horizontal stabilizer in because if you get it wrong, you get a bad flying plane. All the newest Extreme Flight planes feature a self aligning stabilizer. The front of the stabilizer is notched at the center, and the leading edge is flat. The leading edge of the stabilizer saddle in the fuse has two little alignment pieces. You side the stab forward until the flat surface of the LE  butts up against the alignment pieces and that squares the stabilizer up to the wing.


This is an ingenious little arrangement that takes the most stressful part of the build away. Slide it forward, and glue. You're done. However, these are mass produced items, so I always measure mine anyway, partially to be sure, and partially because of OCD.

Filler Pieces
The only thing on the V1 that was not perfect was the slot behind the elevator. It had to be there so you could slide the elevator in and back out of the way before you put the stab in.  We loved the V1 so much no one ever complained about it, but aesthetically it wasn't ideal. For the V1 the MXS borrows a trick first seen on the Velox with little filler pieces to fill the gap.


This might seem insignificant, but the difference in the finished plane is worth it. Every little detail counts

Hardware
I don't like a lot of change just for the sake of change, so I'm really glad Extreme Flight has kept the same hardware package we've been using since the introduction of the EXP series. It's all tough, reliable stuff that we all know forward and backward, which makes it easy to work with. It's also nearly bullet proof, but it's nice most of us have a good supply of spares built up over the years.


New for this plane is Extreme Flight included their excellent metal backplate elite spinner. These have been all i have used for the last 10 years and you just sort of bolt them on and forget about them. They have all come perfectly balanced, are good looking and durable.

Building
The 48s are the everyman's plane, whether you are a new 3D pilot or a veteran.  Since these are such important planes for virtually everyone, Extreme Flight's product development chief, Ben Fisher, has made a nice build-along video. Here he covers every step in real time, so you can prop your phone up on the bench and use the video as a guide. There are lots of great tricks and information in here, even if you are an experienced builder, there's still plenty to learn here. The video covers the Edge build, but most of the video applies to all of the 48s as well.


Most of this build was like a surgical procedure. Everything slid together, bolted together or glued together perfectly. I didn't have to trim or tinker with anything. I was kind of on auto pilot until I got to the cowling, and thankfully, at least for me, you still have to mount it yourself, and I accept that as a challenge to get it perfect. That, or it's my OCD kicking in.

If you follow the procedure in the video manual, and take your time, you can't get it wrong. I've always done mine a little differently, but this time I tried it Ben's way and got really good results. I'll probably keep doing it this way because you can't get it much better than this.

Power System
Once again, it's going to be the Torque 2814/Airboss 45 ESC power system. I have been using this combination in my 48" planes, again, for over a decade. Reliability and durability have been 100% dead solid perfect. There is more power than you actually need, with enough to give unlimited vertical performance, and throttle response is perfectly linear.


Like all Extreme Flight power systems, once you bolt the cowling on you can forget about the motor and ESC and simply fly it. Most of my 2814s and Airboss' are years old, but I have so much faith in them I will drop an old beat up one into a brand new plane with no worries. The Torque and Airboss ESC are the Maytag of electric motors.

I cut a small strip of balsa to use as an ESC mount. It's also a good place to put the Velcro, but it also raises the ESC up just enough that you can slide it back over the next former if you want to move it more rearward. I'm balanced according to the manual, but if I care to move the CG rearward, I can slide the ESC back a little.


BEC
If you are running 6 volt servos, the standard Airboss will feed those just fine. We flew the V1 for roughly a decade like that. For me, though, this is such a high performance airplane I think it deserves the best of everything.

For 8 volt servos you either need a 2s lipo or an external BEC. I chose the BEC because they are not that hard to solder up, and once installed you simply forget about them. A lipo is probably better, but then you have to watch the voltage and charge it, so going with a BEC is one less thing to worry about. I have always used the Castle 10 amp BEC on all my 8 volt planes, and again, am delighted with the reliability and durability.


Here you can see I solder mine up a little differently. Instead of soldering both the ESC battery leads and BEC to the deans plug, I cut back the heat shrink on the wire about halfway between and solder there. It makes putting the deans plug on much easier because you don't have to hold and solder one lead at a time to one place.

I usually mount the BEC on the fuselage side down low, but this time I followed what i did on my 48" Edge. I mounted it against the front of the landing gear block. This puts it dead center in the airflow coming in from the chin scoop. I've never had a problem overheating one before, but this is a better place for it, especially once summer gets here.


SET UP
As always, the manual is the best place to start. My radio only has two rates, so I go to manual and use the "3D rate," and of course the low rate. I don't feel like this is a sacrifice of any kind. Maybe you can get a little more violence out of the plane with the insane rate, whereas the 3D rate is smooth, more
controllable and much easier to fly precisely.  I'm leaning more towards making my planes less wild, smoother and more stable, and this set up does that really well. 

If you want to spin and tumble the plane into orbit though, the insane rate is for you. Most people find the MXS to snaps and spin fine on the 3D rate, and no one complains the plane isn't violent enough.

The other important part of the setup is the low rate. A lot of people fly on high rates all the time, but they are missing out on how well these planes fly precision maneuvers like point and slow rolls. I stick to the manual here and adjust my low rate ailerons to give me three rolls in five seconds. This is extremely easy to keep up with and actually makes a great sport rate. I didn't change it much because the manual rate is extremely close, within 2% or 3%. 

To check the CG on the MXS, I wrap a string abound the tube and set the plane to have the nose hang down just a little. That's just a starting point, but it's very close. You never want to start off tail heavy.

Ailerons
Here I am using the arms that came with the servos. They are the same size as Hitec arms . Using the second hole from the outside, I am getting about 33 degrees of travel. I know the manual suggests 38 or so, but I'm 68 years old and that's a little much for me to hang on to. 33 suits me just perfectly and I can fly it smoother too.


Elevator
Here I use the G10 arm extension on the standard arm. Right now I have not turned up the endpoints in my TX, and I'm at 50 degrees up elevator with down elevator maxed out. I can get as much as 72 degrees with this arm, but we're going to start off a little tamer this time. I've been using less elevator in my planes lately, so we'll try it this way. I can always turn it up if I need more.


Rudder
Here i use a 1" arm to get the throw I wanted One thing I've done differently on my last few builds is move the ball link on the servo arm to the inside. This gives the pushrod a straighter shot at the control horn.