
There are a few different ways to go for putting vinyl graphics on your plane, but for the purposes of this article we're going to talk about the two most popular.
Note: To avoid confusion between the two types of decals, from this point on in the article we will refer to the single piece sheet decals that come with the kits as "kit decals" and B and E high quality "air release" type of decals as simply "decals." There are also two different ways to apply both types of decals, and we will also get into that later in the article.
"Kit Decals"
First are the decals that come with most of the kits. They are printed on a single sheet of clear vinyl, and you have to cut each one out, peel off the backing and stick it down. They are extremely grippy and unless you use a decal solution they are very difficult to position. You can forget about sliding them on because they simply stick too vociferously. Since on any text part of the decal there is clear vinyl between each letter, that's a lot of area to trap air under. To get good results with this type of decal, you just about have to use a decal solution.
Generally I don't like these decals because it is a lot of work to cut them all out, they are hard to work with and they don't look nearly as good as the next type of decal were will be talking about. They still work, and since they come with the kit it makes sense to use them and save the money, provided you are not so super picky and critical as I am.
High Quality Air release Vinyl Decals.
Lately I have been using a lot of high quality vinyl "decals" from B and E Graphix. They now use the "air release" type of vinyl which has little air channels on the back side of the decal. These allow air to be pushed toward the edge of the decal and out. Sometimes the air will escape on it's own if you just let the thing sit for an hour or so. This makes air bubbles under the decal pretty close to a thing of the past.

Applying this kind of decal is also easier because, for one, it is much more forgiving to work with. It you get a decal a little crooked you can get it back up if you are careful. This is much easier than when working with the other type of decal which is so grippy you have no chance to slide it around and adjust it.
On these types of decals you have a backing, of course, but also there is a piece of backing on the front of the covering. This is called "application tape." The reason for this additional piece of tape is because each letter in a text decal is it's own separate piece of vinyl with no clear material between those letters. For instance, on an "Extreme Flight" decal, the "E" and the "X" and the "T" and all the rest of the letters are all separate pieces of vinyl. The application tape simply keeps all the letters aligned until you can get them down, and then you peel the outer piece of application tape off, and you are done.
There are two ways to apply these type of decals. One way is simply peel and stick and then peel off the outer application tape. The other is to use decal solvent, which we will cover later. For now we are just going to peel and stick.
Perhaps a little too confusing to explain in words when pictures work so well, so here are some pictures. As you can see at the top of the picture, the decals still come on one sheet, or in the case of the laser, because there are so many decals, two sheets. Here I have the SFG all cleaned off with lacquer thinner (removes any covering glue residue) and an SFG decal cut from the main sheet.

Below I have peeled the backing partially off so you can see what it looks like and how the three layers are put together.

Now you simply align it and lay it on the SFG. Rub it down and we are almost done.

Now you can clearly see how the application tape does it's job in keeping all the separate pieces aligned for, well ..... application. You just peel it off. It is helpful to peel the tape off in a direction parallel to the surface. This helps you not pull the decal back off or pull the covering from the wood.

And now, the finished SFG.

Application Fluid
Previously I was using Windex for my" kit decals," but I have since learned that the ammonia attacks and dissolves the decal glue and makes the edges not stick quite so well. "Rapic Tac" application fluid works so much better because it is inert toward the glue, and it also seems to allow air to escape better, especially when working with "kit" decals.
For the rest of my new Laser I used "Rapid Tac" decal application fluid. B and E sells this, but you can also get it at most graphix stores. It is really good stuff and makes the job a lot easier, especially on the Laser. The whole idea of application fluid is to allow you to slide the decal around until you get it where you want it, and then squeegie the fluid and air out so the decal will stick.
According to the B and E web page: Using Rapid Tac Application fluid can often allow a large graphic to be installed with one person where two people were required to perform the same installation dry. Rapid Tac Application Fluid also cleans the surface without leaving residues ensuring a contaminant free installation. It then helps to -float- the vinyl film until it is properly positioned.
Also on the B and e web page are instructions for using Rapid Tac.

I found all of this to be true. The stuff works really, really well and gives you are very nicely finished plane.
Previously, for my high quality decals I just peeled and stuck them because none of them were really big and perfect alignment was not super crucial. The Laser, however, is such a special plane for me that everything on it had to be absolutely micrometer perfect. The laser has long stripes and stars, and near perfect alignment is critical to get an great looking replica of Leo Loudenslager's awesome plane.
Of course, I had B and E cut me up a set of beautiful air release decals. It was putting them on that was going to be a bit tricky. I built one Laser just peeling and sticking the long stripes, and while it came out well, it was a huge amount of work and stress getting it all aligned perfectly, though admittedly, the stress was only bad because this plane means so much to me.
For this Laser, I went with Rapic Tac and it was a whole new world of easy. You can use all the Rapid Tac you want because it does not effect the glue. You can wet down the plane and the back of the decal too and it makes no difference except making it all easier to slide around.
Unfortunately my camera started acting all crazy halfway through this project, so I did not get all the photos I wanted. For now, here is a picture of the soft plastic squeegee I got at the graphics store, though I believe B and E has them too.
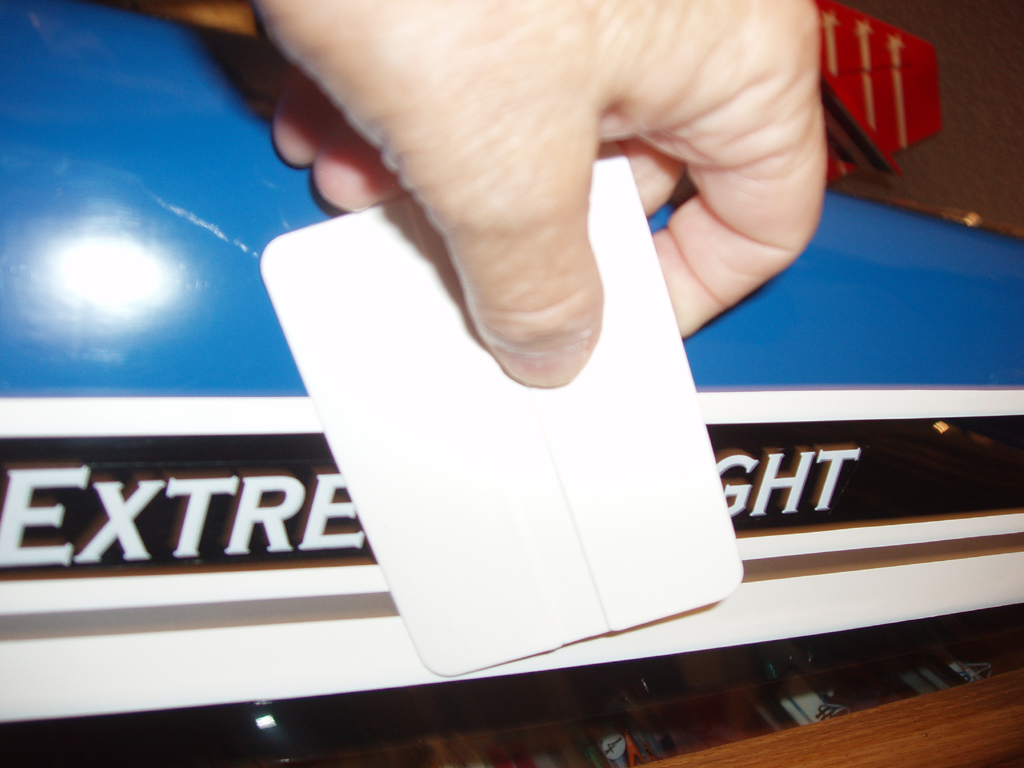
What you do is peel off the backing tape and then spray the area you want to apply the decal to with Rapic Tac. Position the decal by sliding it around on the plane until you get it where you want it. Then squeegee the fluid and air bubbles out from under the decal. On the Laser this was especially helpful to be able to slide the decal onto position because alignment was so critical to get a great looking plane.
Not wanting to screw up an expensive decal set I experimented on a wrecked wing using standard kit decals. Rapid Tac is especially essential with those type of decals because they are so grippy that you can almost never get them straight and with no bubbles. With Rapid Tac they just slide into place where you want them and then you squeegee out the fluid and air. It makes for a much better looking kit decal, but it is still not as good as high quality vinyl decals.
I wasn't able to get any pictures of the Laser decal application but I will take some when I get a new camera and edit the article. However, as you can see, with the long, flowing stripes the decals have to be perfect for the plane to look good. Using the air release vinyl decals and Rapid Tac, I would get one end of the stripe positioned and hold it in place while I slid the other end where I wanted it.

Once you have built so many planes and applied so many stickers and such you develop an eye for getting things straight. Being able to slide the decal exactly where you want it makes things so much easier, whether it is a standard kit decal or high quality air release graphics.
I do plan to build one more Laser for now, and hopefully those will live long enough that I won't have to build any more, at least for awhile. With the 60" Laser coming up I need to keep the build table free of any left over projects. I am sure for that plane I will also use a set of B and E air release graphics, just because it has to be perfect too.

For reliable paint separation and surface protection, detailing workflows often rely on vinyl striping tape to deliver consistent automotive results.
ReplyDelete