The Edge Of Darkness__LIVE
I have always loved the night. It just seems to be when I come alive. I loved racing cars at night and I loved going scuba diving at night. I love to work at night and I love to play at night. Everything seems to have more
mystique when cloaked in a little darkness, and flying is really no different in this respect.
The goal of this article is to help those new to night flying have an easier time breaking in. Previously it was difficult to set a night plane up because the light systems were an afterthought ...... a product originally intended for something else and you had to make it work instead of simply installing it. This made things difficult for the new guys, but now we have something much better and much easier.
Older lighting systems also required that you cut holes in the plane and stick lights over the covering which would ruin the plane's appearance in the day time. The way we have installed our new system, it is not only removable, but you can't even tell it was ever there.
This will be another
LIVE report, so I will be constantly taking pictures and video, and editing the article as we go.
Night Flying In The Dark Ages
I did a lot of night flying a few years ago using the Hobby King LED ribbons for lighting. While those worked well, that type of lighting did present a few problems. With the stick-on type LED strip of lights you had to drill holes in the plane for the wiring, and there was lots and lots of soldering (not my best skill, BTW) involved. The inside of the plane could very easily look like a rat's nest if you were not careful during the build. Trying to do a neat job on a couple of planes using these lights drove
me absolutely crazy, I didn't want to monkey with them any more.
And, of course, the strips were stuck down on the covering. If you tried to remove the lights from of the covering it would sometimes pull the clear outer layer off the covering with it, which pretty much ruined the covering job. With the old system, you just about had to sacrifice an airframe to make it into a night plane, and an Extreme Flight EXP is
simply too nice to do that to.
This is why I abandoned night flying until now. I didn't want to sacrifice such a nice plane by drilling it full of holes, and ruining the covering and appearance of the plane with ugly LED strips.
New Age Lighting
Recently there have been a lot of developments in lighting systems, with
Aurora RC Lighting Systems leading the way. Aurora offers lights for foamies, all the way up to giant scale systems. I chose the Genesis system ($49.87, with an additional $10 light bar for the tail). Aurora assures me this will be enough lighting for the plane, and videos I've seen of the system confirm this. As it turns out, because of the way I mounted the tail light on the canopy, I did not need the extra tail light, but I might install it on the underside later if I am not happy with how it looks after I fly it.
So, as it stands now, I am into the entire light system for about $50, which is even cheaper than the old LED strip light systems used to be. For what you get, it's not a lot of money at all.
This light system is different from the LED ribbons in that they are not colored LEDs. They are white light that shine on the plane and lights the whole thing up like a spotlight. The main lights mount on the SFGs and point inwards, and the real lights (on my plane, at least) mount on top of the canopy pointing rearward.
Detachable
One of the prerequisites for this particular project is that I wanted to be able install and remove the lights at will. It's still a little bit too complex to move from airframe to airframe, but the goal was to be able to add/remove the system depending on when (day or night) I wanted to fly. This makes the installation a little more complex, but then again, we
used to be modelers and occasionally had to figure a few things out for ourselves. Some of this is fun, and some of it is frustrating, but it's all part of the modeling challenge.
What made me interested in returning to night flying is that the Aurora system can be made to be removable without tearing up the plane or leaving unsightly holes drilled for the wiring. At worst I had to sacrifice a pair of SFGs for mounting the main lights, and a canopy for the tail lights, and I can buy replacements for when I want to day fly the plane.
Here's what's great about this system: The old LED strips were freaking ugly in daylight and they completely destroyed the appearance of the plane. With the Aurora system you don't ruin the covering job and you don't drill a bunch of holes in a brand new plane. If you want to fly it in the day, you simply remove the SFGs and the attached light bars, and no one will know the difference.
Airframe
This part could not have been any easier. The choice was so clear that there was never really even a second place. The
Extreme Flight 48" Edge 540T EXP was the only airframe ever considered.
At night it is much more difficult to judge speed and distance, so you need the most stable and forgiving plane you can get your hands on. It is especially critical to have a plane with impeccable low speed manners and a solid, predictable stall characteristic. With this in mind, there was no other choice outside of the Edge EXP.
I usually fly my Edge when I want something supremely easy, and at night that is exactly what you need. I have been without an Edge until recently when I built a new one. I chronicled this in
Extreme Flight 48" Edge EXP___A Righteous Build . This plane came out so well and I am so proud of the build that I did not want to convert it to night flying. Instead, since I love building EXPs so much, this just gave me a convenient excuse to start with a new kit!
I'll skip the details of the actual build because I have covered a lot of that in my other Edge articles, plus
Herc's Awesome Build Videos pretty much cover it all anyway. If you're building your first EXP, or even second or third, Herc's videos are still a darned valuable reference and resource. I will usually sit and watch one a few days before my kit gets here, and that way I am both psyched for the build and a little better prepared too.
Installing The Light System
I knew going in that my OCD would kick in pretty hard once I started laying the light system out. I was going to have to modify a few things to meet my goals, but nothing too drastic and nothing that a few modeling skills couldn't overcome. That and I got a bit of soldering help from my friend Mad Mikey.
To power the system I could choose either from running the lights straight off the 4s, 14.6 volt battery that also powers the plane, or reduce the voltage to 11.1 by running it through a Castle Creations BEC set for that. You can also run the system off the plane's main LiPo, or even it's own independent battery, but I am a bit loathe to keep adding weight to a lightweight high performance airframe.
Wanting to keep it simple, I wired the system straight to the Lipo. This way I just unplug it when I fly in the day. Here you can see that I soldered a male and female deans plug back-to-back, with the wires to the light system driver (the brains) also soldered on and then heat shrunk. The ESC is already plugged into this piece, and then the whole thing plugs into the battery. If I want to fly in the day, I just leave this piece out and hook up the battery to the ESC just like normal.

The genesis system is designed for foamies, (which do not generally have detachable wings) and thus, the wiring for the main lights are not removable from the main driver unit (the brains). This would make removing the wings a major pain, and then I would have to fish the wires through the wings again when I reassembled it. To get around this, I soldered some mini deans connectors in-line so I could detach the wiring inside the fuselage. This way I just unplug the lights for the wing much the same way you would unplug the aileron servos when you break the plane down for transport.
Light Mounting
The lights themselves are mounted on the end of a carbon fiber rod. For future reference we will call these finished units the "light bars." For mounting the light bars to the plane, Aurora supplies
Arrow nocks.
Yeah, I didn't know what they were either until I got my hands on a pair.
These arrow nocks are plastic pieces that fit into the rear end of an arrow shaft and they have a slot in them that the bow slides into. This slot is just the perfect shape and size in to which to snap the light bars. I used two on each light bar so it would have a sure mounting. The last thing you want is to sling one of your lights off in a violent maneuver, so a little overkill here isn't going to hurt anything.
For the main lights, I drilled holes in the
side force generators (SFGs) and glued the arrow nocks in, then snapped the light bars into place. You might notice the SFGs on this plane are smaller than the standard EXP version. You don't want the SFGs to block the light going onto the plane, so something a bit more compact was needed. I also wanted a little more clearance because the ground is always a little closer than it seems at night, and again, you sure don't want to hit it on the deck and knock one set of your lights off.
The Edge is so good in post stall, and so stable all the way around that cutting the SFGs down a little would not hurt it any. Certainly I prefer using SFGs, but I've tried the Edge EXP without them, and like this it merely needs a little more rudder application when flying in knife edge. Harrier and other post stall flight doesn't seem to change much. So far the smaller SFGs seem to work just fine: better than nothing, though not quite as good as the full size EXP SFGs.
I copied a Scott Stoops design, and had them custom laser cut locally from thin, lightweight plywood by John Sharpless of Precision Laser, whom I flew with years ago in the old nitro dark ages.
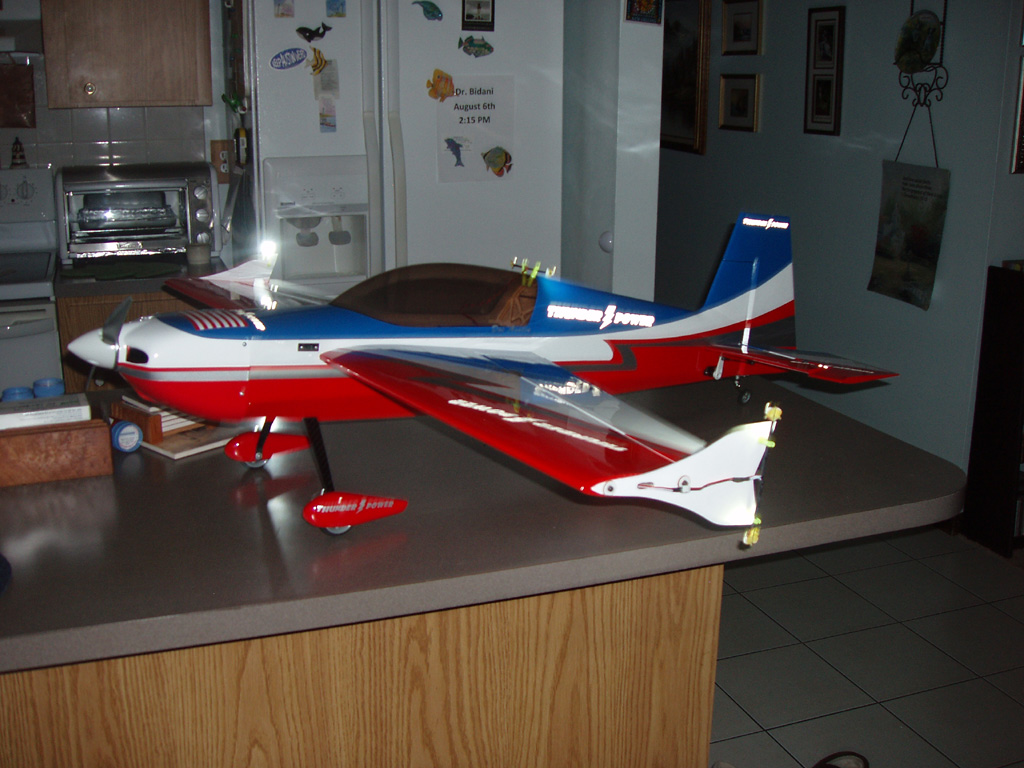
I did not want to mount the tail lights permanently because that would mean drilling holes in the plane for the wiring, and I an still not sure how I would fish them through the stab, so instead I mounted them on the canopy pointing back toward the tail. As you can see in later pictures, this lights it up pretty good.
For the driver system I cut a little balsa shelf and mounted it across the fuselage on top of the carbon longeron stringers. The red and black wires are the mini deans connectors I added so I could detach the wings and leave the wires still inside.
As you can see, it was not all that difficult to get a clean install here. This is much, much neater than the old way. Once I had everything thought out, it only took about an hour to install the system. The worst part was fishing the wires through the wings, which is why I made them removable.
In all, the Aurora system was very complete and well thought out. Again, this particular system is designed for a foamy, so it was going to take some tinkering to get it to work the way I wanted on a balsa 48". I plan to send this blog article to Aurora and perhaps they will offer it with the main wires detachable so the new guys will have an easier time breaking into night flying.
Especially worth noting is that aside from having to solder in the deans plugs to make the wings removable, the entire system just dropped right in and it was a very easy installation. It was immeasurable easier than those old Hobby King light strips.
There is also very little wiring and all the hardware is pretty lightweight, so you won't be loading the plane down with this system. It's very definitely much lighter than what I have used in the past.
FLYING
As of this writing, I'm still waiting to fly the plane, but I can give you some observations about night flying from my previous experience.
While this will be a little different, I am pretty confident that I know what to expect. The difference is going to be that the plane will be much better lit up and I will be flying the plane and it's color scheme instead of the outline of the LED strips I used in the past.
Generally speaking, if your plane is well lit up night flying is really no more difficult than day flying, outside of a minor pitfall or two. First, speed and distance are harder to judge, meaning that a stall can surprise you if you are not careful. I found that it was much easier to judge my slow flight if it was right in front of me where I could really see it.
Also, for some odd reason I am at a loss to explain, the ground is about a foot higher at night! Again, it is very hard to judge distance because the night robs you of your depth of field. You don't have any stationary objects (or at least you can't
see them) for you to use to judge your speed against. I eventually learned to use things in my peripheral vision, such as lights in the distance, the moon, and even the light from the plane reflecting off the runway. These are things that gave me an indicator of how fast the plane was going.
This is all something that you just have to be aware of when you start, though no one told me and I learned by having a few really close calls and a scuffed wheel pant or two. After a few flights I was hammering away and flying my usual routine right on the deck. It's really not any more difficult. You just need to get a flight or two under your belt to gain confidence, and then you will wonder why you didn't try night flying sooner.
It looks like we will try to shoot night video on Thursday, so stay tuned.
Edit, August 20, 2014: We're getting closer. I completely finished up every little detail simply because I have had so much time on my hands while recovering from my hospital stay. I finally got the lights aligned as best I possibly could and used a hot glue gun to weld them into place so they can't slide around inside their aero knots (mountings).
My biggest problem with night flying is that all clubs in Pinellas County (where I live) are on county park property, and county law says all parks close at night. If I try to test the plane at night I'll be breaking the law, and I am kind of trying to stay out of jail, at least this week.
With everything finally completely buttoned up, I do want to trim it out again in daylight, or preferably, at sunset, and make sure I've got the CG right. We did a single flight on the plane in day trim when I built it, but the CG has changed with the lights added. The plane flew perfectly, so I am confident any pre-night flying testing I can get in will be a formality and everything will be fine. I am just being thorough and obsessive.
For tonight I am hoping to do a quick sunset hop just to make sure all the systems are working properly, the CG is good with the lights installed, and the lights stay lit under a flight load and vibration. The great thing about sunset flights is you can see what the plane looks like lit up, but if you have a problem there is enough ambient light to get her back down safely.
Sarasota is an hour away, so I don't want to get down their and find out something isn't working right. I just want to go down there and fly with my friends, so this is why I am a bit obsessive about getting this plane perfect. I also really want to go to one of the Georgia October events, probably the one at Hodges and do some night flying with Manta, Chris Nobles and the rest of the Hodge Hounds. there won't be time or finances to build another one, so this one has gotta be right.
Edit, August 10, 2014: Well, we meant to fly it. We really did. Unfortunately I landed in the hospital the day before we were scheduled to go night flying in Sarasota, so that kind of puts an end to that for now. I'm going to give it a week or two for myself to recover, and then we'll try it again.