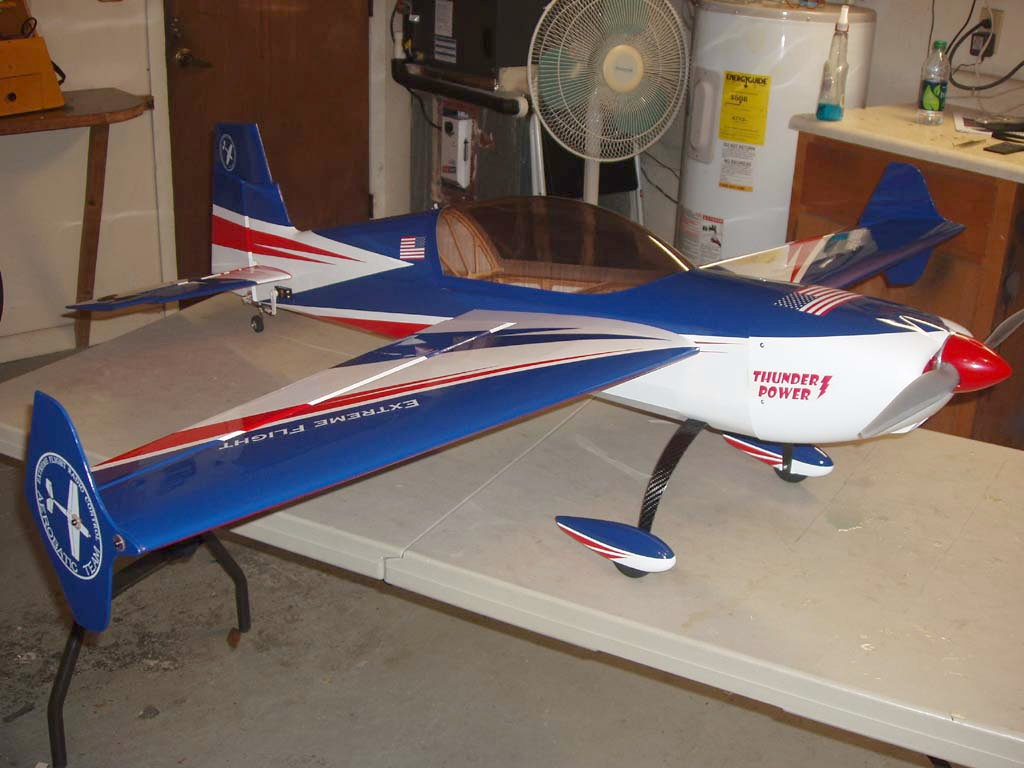
After flying the Extreme Flight 48" Extra EXP for about a year, I was really anxious to get my hands on one of the new 60" variants. Mine has been finished for about a month or so, but I have been unable to get over to Jim's to pick it up So, it's just been sitting over there, while I've been sitting over here chomping at the bit to get my hands on it
In late October I had the chance to run a few packs through Chris Noble's 60" Extreme Flight Edge 540T EXP and was delighted with how floaty it is. It was also much more smooth and precise than it's smaller sibling, which I was sort of expecting because that's just how larger planes generally are. I was still surprised at just how good the plane was, though.
As much as I like the Extra, I am sure this will translate over into a larger one. The 48" Extra EXP and 48" MXS EXP have become my go-to airplanes. I try really hard not to make one of them my favorite over the other, but whenever I can't decide what to fly, I always reach or the Extra. I like it's precision and smoothness, so when it came time to choose a bigger project, these are the attributes I went after, and that meant getting the big Extra EXP. That, and the big MXS isn't out yet!

Opening the box I was pleasantly surprised to find the larger EXPs are also a little more nicely turned out. The covering work seems a little better done with special attention paid to getting all the edges sealed down tight. On this model none of the holes in the covering were pre-cut as on the little ones. I actually prefer it this way because I am pretty obsessive about getting this part perfect. In general, the whole package seems just a bit nicer, though the smaller EXPs were already the nicest planes I have ever owned.
Extreme Flight wheel pants have always been extremely well put together and very durable. The only thing missing was a nice color coordination. On the big Extra, the pants are three colored, and painted to fit in with the rest of the model's scheme. It is just a nice little touch that visually makes a big difference.
Control Set Ups
I have had such good luck with Hi Tec servos that it made sense to continue that with this plane. These are the recommended HS-5245 servos.
These linkages are similar to those found on the 48" EXP series except the bigger planes use a slightly beefier ball link. I like these a lot because you can really tighten down the bolt that secures them and that won't make the ball link tighten up like happens with the smaller ball links. I put a lot of effort into getting the my ball links operating smoothly with no drag, so this saved me a lot of time.
Also new for the 60" planes are 2mm lock nuts for all the ball links. I've been using these for awhile, but I had to mail order them from
Micro Fasteners, because almost no one sells something this small locally and they aren't on the Dubro rack. It's nice they now come with the kit.
As is customary on all my planes, I use Dubro 2mm hardened allen bolts and double nut all the ball links, then put a drop of thick CA on the exposed threads. Like this they will never come off on their own, but if I want to remove the ball link, I simply back off the outer nut and that will shatter the CA.
I'm using the Dubro extended arms, with the longest two on the elevator and rudder, and the next largest size on the ailerons. Like this I only needed one pack of arms to do the whole airplane.
Here you can see that I used the second hole from the outside on the second longest longest arm that comes in the Dubro extended arm kit. With my end points set at 140%, this gives me about 32 degrees of aileron. Tim Senenero told me that 30 degrees is more than plenty and any more would be too much.
Since the above writing I have flown the plane once and it indeed had plenty of throw and rolls were super fast. I'de say it's about 20% faster than my 48" planes, and those roll pretty rapidly. I'm going to put a few more flights on it before I make any more changes, but so far I like it a lot like this. It makes the plane really agile.
Using the biggest arm, I am getting around 60 degrees of elevator travel. Tim also tells me the bigger planes have a lot more pitch authority and 90 degrees of travel is strictly not necessary. I'll try it at 60 and see how that goes. I can crank it back if I have to.
For the rudder I again used thew second largest arm and pegged my end points. This give me plenty of travel and the Extra is pretty responsive to the rudder anyway.
Battery Placement
For this project I chose Thunder Power 6s 3850 Pro Power G6 65C packs. I've been having outstanding results with the 65C packs in both 3s 2250 and 4s 2700 size, so it made sense to stick with what is working. With the pack against the tube, the CG is sitting right on the middle of the tube, which should be about perfect. For the test flight I will move it forward about 1/2". I don't plan to get real crazy on the test flight anyway, so being a little bit nose heavy won't hurt anything.
Power System
The only thing good enough for one of these planes is genuine Extreme Flight Torque Motors and Airboss Elite ESCs. I really loved my older Torque 4014 motors, so the improved 4016 was the obvious choice. The Extra was designed around this motor, so it just bolts right on with no hassle at all.
Torques are smooth and powerful. They are also damm nice looking motors. I ran this one up just to check it and the thing is a monster. Power isn't going to be an issue with this plane.
I mounted the ESC in it's usual place on the left size of the motorbox. With the front former being sealed off I wasn't sure it it would get enough air mounted on the bottom, but I know it will get good flow where I put it. I may move it later.
Receiver Installation
This one is just as well thought out and conveniently laid out as it is on the 48" EXPs. By mounting the receiver just behind the wing tube, not only does it stay out of the way of the battery, but it is conveniently located for the aileron leads to come straight out of the wing and plug directly into the receiver. I didn't even use any extensions. The leads from the servos in the tail run through holes in the bulkheads, up through the bottom of the receiver tray and plug in. This minimizes the leads slapping around inside the plane and having one potentially wiggle itself out of the receiver. All of this also makes a really neat looking installation, which is something I really appreciate.

The big Extra is engineered and constructed a lot like the little one, and this gives me a lot of confidence. I've also flown an older Extreme Flight 58" Extra 300, and it was a real pussycat. I expect the EXP to be a lot like it, only smoother and more precise, and also more powerful with the stronger 4016 motor. We'll hopefully know tomorrow, and also hopefully capture it on video.