Search This Blog

Saturday, December 24, 2011

Just in time for Christmas

Here are a few wallpapers of the new Extreme Flight 60" Extra EXP.


Wednesday, December 21, 2011

First Look__Extreme Flight 60" Extra EXP


After flying the Extreme Flight 48" Extra EXP for about a year, I was really anxious to get my hands on one of the new 60" variants. Mine has been finished for about a month or so, but I have been unable to get over to Jim's to pick it up So, it's just been sitting over there, while I've been sitting over here chomping at the bit to get my hands on it

In late October I had the chance to run a few packs through Chris Noble's 60" Extreme Flight Edge 540T EXP and was delighted with how floaty it is. It was also much more smooth and precise than it's smaller sibling, which I was sort of expecting because that's just how larger planes generally are. I was still surprised at just how good the plane was, though.

As much as I like the Extra, I am sure this will translate over into a larger one. The 48" Extra EXP and 48" MXS EXP have become my go-to airplanes. I try really hard not to make one of them my favorite over the other, but whenever I can't decide what to fly, I always reach or the Extra. I like it's precision and smoothness, so when it came time to choose a bigger project, these are the attributes I went after, and that meant getting the big Extra EXP. That, and the big MXS isn't out yet!


Opening the box I was pleasantly surprised to find the larger EXPs are also a little more nicely turned out. The covering work seems a little better done with special attention paid to getting all the edges sealed down tight. On this model none of the holes in the covering were pre-cut as on the little ones. I actually prefer it this way because I am pretty obsessive about getting this part perfect. In general, the whole package seems just a bit nicer, though the smaller EXPs were already the nicest planes I have ever owned.


Extreme Flight wheel pants have always been extremely well put together and very durable. The only thing missing was a nice color coordination. On the big Extra, the pants are three colored, and painted to fit in with the rest of the model's scheme. It is just a nice little touch that visually makes a big difference.


Control Set Ups

I have had such good luck with Hi Tec servos that it made sense to continue that with this plane. These are the recommended HS-5245 servos.

These linkages are similar to those found on the 48" EXP series except the bigger planes use a slightly beefier ball link. I like these a lot because you can really tighten down the bolt that secures them and that won't make the ball link tighten up like happens with the smaller ball links. I put a lot of effort into getting the my ball links operating smoothly with no drag, so this saved me a lot of time.

Also new for the 60" planes are 2mm lock nuts for all the ball links.  I've been using these for awhile, but I had to mail order them from Micro Fasteners, because almost no one sells something this small locally and they aren't on the Dubro rack. It's nice they now come with the kit.

As is customary on all my planes, I use Dubro 2mm hardened allen bolts and double nut all the ball links, then put a drop of thick CA on the exposed threads. Like this they will never come off on their own, but if I want to remove the ball link, I simply back off the outer nut and that will shatter the CA.

I'm using the Dubro extended arms, with the longest two on the elevator and rudder, and the next largest size on the ailerons. Like this I only needed one pack of arms to do the whole airplane.

Here you can see that I used the second hole from the outside on the second longest longest arm that comes in the Dubro extended arm kit. With my end points set at 140%, this gives me about 32 degrees of aileron. Tim Senenero told me that 30 degrees is more than plenty and any more would be too much.


Since the above writing I have flown the plane once and it indeed had plenty of throw and rolls were super fast. I'de say it's about 20% faster than my 48" planes, and those roll pretty rapidly. I'm going to put a few more flights on it before I make any more changes, but so far I like it a lot like this. It makes the plane really agile.

Using the biggest arm,  I am getting around 60 degrees of elevator travel. Tim also tells me the bigger planes have a lot more pitch authority and 90 degrees of travel is strictly not necessary. I'll try it at 60 and see how that goes. I can crank it back if I have to.


For the rudder I again used thew second largest arm and pegged my end points. This give me plenty of travel and the Extra is pretty responsive to the rudder anyway.


Battery Placement

For this project I chose Thunder Power 6s 3850 Pro Power G6 65C packs. I've been having outstanding results with the 65C packs in both 3s 2250 and 4s 2700 size, so it made sense to stick with what is working. With the pack against the tube, the CG is sitting right on the middle of the tube, which should be about perfect. For the test flight I will move it forward about 1/2". I don't plan to get real crazy on the test flight anyway, so being a little bit nose heavy won't hurt anything.

Power System

The only thing good enough for one of these planes is genuine Extreme Flight Torque Motors and Airboss Elite ESCs. I really loved my older Torque 4014 motors, so the improved 4016 was the obvious choice. The Extra was designed around this motor, so it just bolts right on with no hassle at all.

Torques are smooth and powerful. They are also damm nice looking motors. I ran this one up just to check it and the thing is a monster. Power isn't going to be an issue with this plane.


I mounted the ESC in it's usual place on the left size of the motorbox. With the front former being sealed off I wasn't sure it it would get enough air mounted on the bottom, but I know it will get good flow where I put it. I may move it later.


Receiver Installation
This one is just as well thought out and conveniently laid out as it is on the 48" EXPs. By mounting the receiver just behind the wing tube, not only does it stay out of the way of the battery, but it is conveniently located for the aileron leads to come straight out of the wing and plug directly into the receiver. I didn't even use any extensions. The leads from the servos in the tail run through holes in the bulkheads, up  through the bottom of the  receiver tray and plug in. This minimizes the leads slapping around inside the plane and having one potentially wiggle itself out of the receiver. All of this also makes a really neat looking installation, which is something I really appreciate.


The big Extra is engineered and constructed a lot like the little one, and this gives me a lot of confidence. I've also flown an older Extreme Flight 58" Extra 300, and it was a real pussycat. I expect the EXP to be a lot like it, only smoother and more precise, and also more powerful with the stronger 4016 motor. We'll hopefully know tomorrow, and also hopefully capture it on video.


Friday, December 9, 2011

Extreme Flight MXS__Bad Attitude And Sunset Huckin'


The MXS has been the best plane I have ever owned for  seat-of-the-pants,  on the edge, Bad Attitude flying. I push the MXS harder and harder every time out, and the plane seems to like it. Lately Project Blue MXS #3 has been getting all the miles, and I have a lot of confidence with this plane.


You can see how badly the sun is in our eyes. On a few of the long slow rolls, there was no way to escape flying through the sun, so I would drop it down in the middle of the roll to get under it. I didn't realize I was doing that until Manta pointed it out. I guess I have so much confidence in the MXS that most of what I do with it is instinctual.

I wanted to squeeze in one last video before the sun got so low that it would be impossible to see the airplane any more. There is a window of 30 minutes or so between that and when the sun drops behind the hill of death and you can see again....and fly into the sunset.

Next, the sun is gone, but the conditions, while beautiful, are still extremely hazardous. If you get over to the right, the sun washes out the color of the plane and you'll be staring at a grey airplane. Notice when coming back to the left of the camera all the colors explode back to life. It depends on where the plane is in relation to the sun how well you can or can't see it.


We have avoided a lot of sunset videos simply because it normally freaks the cameras out, but Manta's Iphone seems to do a darned reasonable job of it.


Throttle Mix For Better Performance

Awhile back, Andrew Jesky told me his trick for getting better throttle response out of an electric motor is to bump up the throttle trim until the motor starts idling. I tried this and it works great, but messing around with the trim was too much trouble considering that you can mix in just about anything with the fabulous new computer radios.

So, I tried a mix and put it on a switch. That way the idle is on/off. This is much quicker in the event of a crash or nose over than working the trim until you hit center. Just turn it off.

Some people have been having trouble with the latest ESCs studdering on start up. The newest versions can sometimes be a little fussy to get going from a complete stop, but again, run an idle and it all goes away.

While this is not all that uncommon, running an idle stops this problem cold. Where some guys are having a bit of trouble is from absolute dead stopped. The motors kick back and forth and don't really want to get going, but if you run an an idle, they will start up as soon as you flip the switch.

Now, this studdering on start up is completely different from out of sync timing, which causes the motor to squeel and stop completely. Start up studdering is only from dead stop and I've never seen it cause a problem in the air, because the motor never completely stops in the air unless you has the ESC set with the brake on.

I fly Futaba, so I run a channel three to channel three (throttle to throttle) mix. I flip it on, and then dial in the amount of idle I want and put it on my timer switch. The only thing you have to be careful of is to make sure your idle switch is set to off when you plug the battery in. Otherwise, it won't work. I put the idle on my timer switch because that makes one less thing to remember. I was always forgetting my timer before, but I never forget the idle.

For Futaba Users Only

I go to PMX (pre-mix) and set throttle as master, and throttle as slave. Put the mix on a switch, and I like my "A" switch for that simply because that's where my timer has always been. Turn the TX on with the "A" switch in the off position, plug the battery in, turn the Airboss switch on. Let the ESC play the tune, then flip on the "A" switch and dial in the mix until the motor idles. I usually end up with around a minus 27 to minus 30 mix.

After that, be careful that the "A" switch is off before you do anything. When the ESC is turned on, it will look for the endpoints of the throttle range, and if the switch is in the on position, it will ignore the mix and it won't work.

The procedure is: "idle" switch off, radio on, airplane on, flip "A" switch to start idle. If you screw it up and the idle doesn't work, flip the "A" switch off, unplug the battery and start over.

I know it sounds very complicated, but that's just how it plays out in writing. If you could see me do it, you'de agree that it's really pretty simple. It just translates into 1000 words.

Sunday, November 20, 2011

Inside The 48" EXP__ Details


While the EXP series' performance is what sets them apart from the rest, not everyone sees the engineering that went into making them such superior airframes. A lot of it is hidden under the cowling, canopy, and covering. Certainly sound aerodynamics come into play, but there is much more. EXPs feature revolutionary composite reinforcing of critical areas, and even employ some old principles to gain strength while saving weight.

When designing the EXP series, nothing was discounted as a way of improving the finished planes. One example is the extensive use of reasonably priced (compared to carbon) G10 composite material. There are times you need low weight and strength, but expensive carbon is not necessary. For these applications, Extreme Flight saved weight and money while sacrificing nothing to make the planes stronger and more rigid.

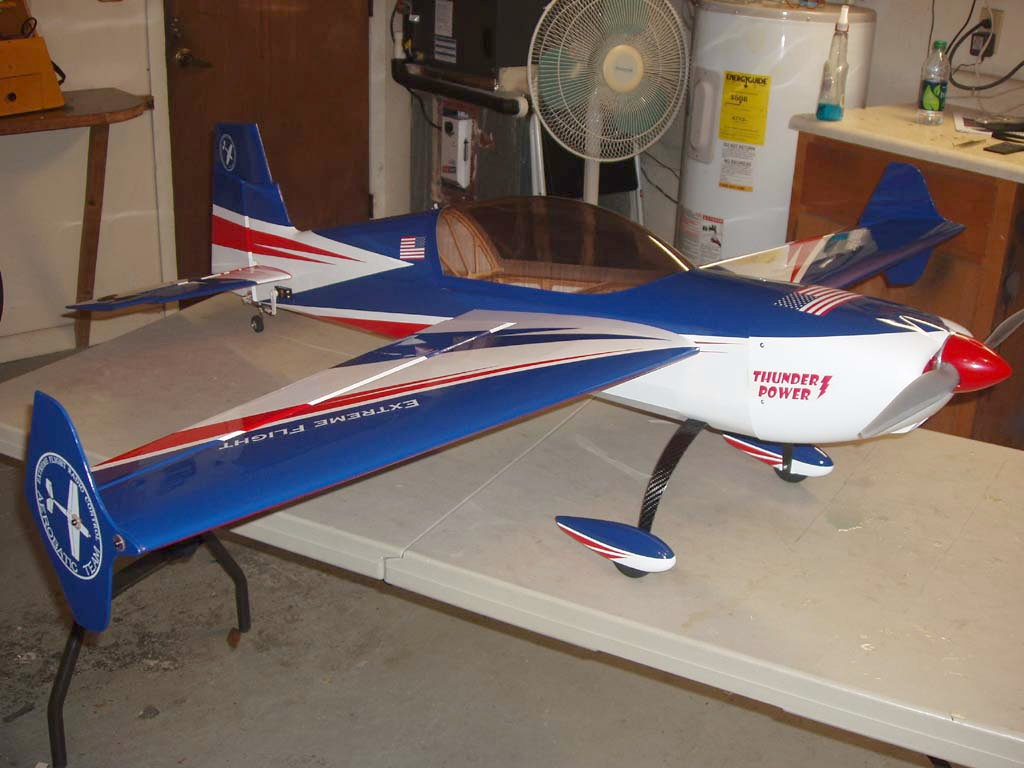
I've been flying the EXP series planes for about a year, and exclusively since about March. It has taken almost all of that time to go completely through the planes to discover all of the little things we are going to talk about, and I am not sure I have yet found everything!

Motor box Re-enforcing
This had to be the strongest part of the airplane for a lot of reasons. First, it gets torqued constantly, and takes a lot of abuse in prop strikes, out of balance props, etc. You also want the entire assembly to be as rigid as you can get it so the power is transferred to the propeller instead of being wasted flexing the motor box.

As you can see, the front of the motor box is reinforced with strong lightweight G10 composite material. This is the area where a a lot of motor box failures occur..... right behind the firewall. The face of the firewall itself is also covered in G10. This keeps the X mount from denting in the firewall if you over tighten it, like happens with bare wood, and avoids unwanted thrust angle changes


Extreme Flight solved a few big problems with it's carbon rod reinforcement of their motor box. As you can seem it is braced top and bottom. This makes the whole unit extremely rigid, which is what you need to get the maximum energy going from the motor.

Notice the carbon rods are mounted to thick plates that are extensions of the firewall and landing gear plate. The top rods anchor at the rear right into the first former.  These are the most solid and rigid attachment points on the plane. They are also backed by strong G10 composite material. This is one stout assembly!


 To achieve rigidity, most motor boxes extend way back into the battery compartment, and this can interfere with changing out the battery. On EXPs the motor box sides stop right at about the rear of the front former. This allows a very generous space for the battery, and there are no motor box sides to interfere with strapping the pack in. You don't have to struggle to change out the pack....just drop it in where you want it! Notice how the battery, strap, and deans plug are all right out in the open where you can easily get to them.


Cooling
Extreme Flight has Incorporated several ingenious solutions to motor and ESCs cooling. Since everything is air cooled, the obvious answer is more air, though these are a few novel solutions for how to move it about where it is needed. First are the cooling baffles that come with the kit. Since we are flying scale aerobatic planes that have air openings on each side of the spinner, it makes sense to channel that air to the motor, which is exactly what the baffles do. They assemble with very little effort and do the job as simply as possible, which is always the best solution.


Notice the holes in the firewall. The one in the middle is for the collar on the motor shaft to stick through, but the other four line up perfectly with the exit holes on the back of the Torque 2814 motor. The baffles channel the air into the motor,  it flows unrestricted out the back and through the holes in the firewall. My Torque motors have consistently run 10-15 degrees cooler in the EXP series planes than any other plane I have flown them in.


The next photo is a rear view of the firewall. Here you can plainly see through the firewall and into the back of the motor and it's windings. This is where the air exits the motor completely unrestricted, and this is why Torque motors run so cool in these planes.


The power system for EXP series planes are part of a totally integrated package. The EXPs were designed around these motors, which is why that is all I will run in them.


More Composite Goodies
We've all ruined at least one 3D plane by pulling a weak landing gear mount out. This seems to be the Achilles' heel of a lot of otherwise nice airplanes. Extreme Flight addressed this by putting in a huge G10 composite landing gear block. You can see it in the photo just under the battery tray. The plate keys into the three formers, making the entire structure extremely durable.

Notice the G10 composite plate extends past the front LG support former all the way to the first former, and keys into that former. This not only gives the landing gear mounts more support, but it stiffens the entire front of the airplane.


In most big impacts, the carbon landing gear will take the impact and flex enough to ward off any damage. If you really pile it in, the gear will again take the abuse and fail, usually saving the airframe from any damage. Of course, you can break anything if you hit hard enough and the right way, but it is hard to imagine any other plane on the market could take this...........


When you look a little deeper, you will see that even with extensive use of G10 composite, there is still a lot of carbon fiber in these planes. Carbon rods run from the first former all the way back to just ahead of the stabilizer. The next photo is the Extra, and you can see the turtle deck also has a rod running along each side. This is presumably because Daniel Holman uses this location to catch and release his planes!

There are also carbon rods running the length of the fuse along the bottom corner, and another just above that. since they are so hard to see against the black covering, I have drawn in some red arrows to highlight their location.


Also reinforced are the wing tube mounts, another critical area. Notice too the dual carbon anti-rotation pins on the wings. Also,  at at the last former visible in this picture, the fuselage is braced by yet another carbon rod. The more you look through these planes, the more expensive carbon and G10 lightweight material you will find. You will see lots of bragging about the use of composites in other manufacturer's advertisements, but Extreme Flight just puts them in the plane and acts like that's how an elite airframe should be built..... because it is.


With the kind of throw we demand from our 3D planes, the standard servo arms are generally not long enough. Extreme flight again turns to G10 composite for the answer. The solution is a simple extension that slides over the back of the standard servo arm, and secures with a single screw and a little cyanoacrylate glue. Being a bit obsessive, I used two screws, but you can certainly see what a neat and tidy looking item it is. It is simple, and elegant, like the rest of the airplane.


Big Bevels
On problem we have had with 3D style planes from the beginning has been getting enough movement in the control surfaces without having a huge gap in the hinge line. A big gap gives you poor control response (especially at low speed), and can contribute to serious, plane destroying high speed control surface flutter. A big gap is bad, but until now there has not been a good solution to avoid it and still have enough movement.

Extreme Flight addresses this with deep bevels in the leading edge of the control surfaces, and in the trailing edges of the flying surfaces. You will see this on some larger planes, but this is the first time this technique has been applied to a plane in this smaller size.

Because I build my EXPs as soon as I get them, I don't have a picture of an unassembled elevator and stabilizer, but here you can plainly see the deep bevels. Also visible is how tight of a hinge gap you can get with these planes.


I generally seal all my control surface gaps with clear Monokote, but on one of my EXPs I forgot and only discovered my mistake 100 or so flights down the road. You don't need to seal the gaps on these planes, but I will still do it because I always have, and this way as far as the air is concerned, there is zero gap.

With the EXP's beveled surfaces, I can get nearly a full 90 degrees of throw out of the elevator. The Extra EXP below measured out at 88 degrees, but only because that is all the servo had. There was still enough movement left in the surface to get the full 90 if I wanted to use a longer arm. Still, I think 88 degrees is probably enough.


Geodetic Construction
Another innovation in this size plane is a very old technique that dates back to the flying wires on WWI biplanes, geodetic construction. This is an extremely lightweight method, yet incredibly strong and rigid. Because this construction is so rigid, you are much less likely to have a control surface warp on you.

The EXP's stabilizer, elevators, and rudder are all made this way to save weight in the tail without giving up any stiffness or durability. This is a very labor intensive and expensive method of building a plane, but nothing has been compromised on the EXP series.

Below is the elevator of my beloved original MXS EXP.....


One little departure from conventional geodetic construction is the little brace that bridges the leading edge of the elevator and the counterbalance. This is an area that is very vulnerable to snagging on high grass, runway edges, etc. You can really tear an elevator up if you catch it on the ground the wrong way, but Extreme Flight has beefed the structure up considerably here.

I caught my elevator in the grass when I blew a harrier turn and broke the counterbalance. With the geodetic construction, it amazingly popped right back into place, and I was able to glue the break simply by injecting some CA in there, through the covering, with a diabetic hypodermic syringe. A little heat with the trim iron,  and the hole made by the needle closed up. You could not even tell the elevator was ever broken.  It is these kind of things that used to make me crazy, but the repair came out so good that I actually forgot about it.

On another MXS, while transporting, my flight box fell over on the elevator and smashed it up really good. I fixed this by removing the covering on the bottom (where repairs show the least) , pressed everything back were it belonged, CAed it, covered it up. Good as new.

Form my experience so far. I have been able to make these repairs simply because they sustained so little damage in incidents that you have probably ruined elevators and stabs on other planes.

Canopy Reinforcing
One of the things I have found infuriating is how easily you can damage a canopy simply if you are a little careless putting it on the airplane. The rear edge takes the beating almost every time, and on most planes it's thin plastic anyway. Especially vulnerable is the bottom rear corner of the canopy because that's where it touches down. If you get it a little crooked you can fold that corner right under, and most times that's all it takes to fatigue enough that it later frays or breaks off all together. I've seen a few canopies where the whole back edge was all chipped up and jagged.

Now, granted, I am a bit persnickety about little details like this, but it is little details that set the EXP series so far apart from other planes. The EXP canopies are thicker and tougher than most other canopies anyway, but there is more.

Working on a new Edge EXP yesterday I made a little discovery. The inside of the canopy on the bottom rear corner is reinforced with strong, lightweight G10 composite material! As long as the Edge has been out, no one has ever brought this up because it is such a small little detail. I might just be the first person who has ever noticed it, but clearly this is the kind of attention to detail that Extreme flight puts into every one of it's products. Little things like this give you a quality product that will hold up to daily use, and maybe even some unintended abuse.


Solid Construction
There is nothing really innovative here except wood working principles that have been proven over the centuries. This is an SFG that I recovered. You will notice how all the joints are notched and keyed. This gives you the largest amount of wood to wood glued surface, and an incredibly strong bond, all while making a surprisingly light structure.

You can tell from the direction the wood grain runs that Extreme Flight was going for maximum rigidity. Any rigid flying surface is going to flex less, and be more effective.

SFGs are mostly an after thought for some airframe manufacturers, but for Extreme Flight it is another place where solid engineering and superior build quality makes a difference in the flying.


NAIL
The big details set the EXPs apart from the rest of what's available, but the little things like this make just as big of a difference. Thing is, the EXPs are full of little things like this. I am sure I missed a detail or two,  or maybe even haven't discovered them all yet, so I fully expect to be adding to this report in the future. You just have to look at how well things are thought out on these planes and these things will start jumping out at you.

Finally, no blog report would be complete without some sort of video. Below is a compilation of some previous footage that showcases how all this attention to little details adds up to so much performance.


Tuesday, November 15, 2011

Extra EXP__Project Red

We have recently shot a lot of video of this plane and have been so backlogged that I have not had a chance to update the blog. Sorry, so here we go:


There are so many red airplanes out there that it is easy to overlook any of them. It's the yellows, greens and orange planes that usually catch my attention. Initially I was completely happy flying just the blue version of Extreme Flight's Extra EXP . Then, when I wrecked my blue Extra EXP, I wanted something different.

However, I definitely wanted another Extra EXP, so I built a red one. I have to admit I am a little tired of red planes, though this one has grown on me really quickly.


I've really become comfortable with the Extra EXPs. It seems like when I stick with the Extra I almost always seem to have some sort of flying breakthrough. I've made a lot of progress flying this red one, though I am not so sure in which area. I think I am flying smoother and more in control, and all this has happened since I started concentrating on this plane.

Click on any of these smaller artworks and they will enlarge to a full 1920 X 1080, which is great for desktop wallpapers on wide screen monitors.


This has been an exceptionally good airplane because I have flown it really hard and it has taught me a lot. I've also really, really enjoyed it, which is the most important consideration.

I've trashed about four sets of wheel pants on this plane, which is why in the artwork you see so many different colors. I generally use whatever I have handy that doesn't clash, and this time I had a set of reds that were doing nothing. I think I like this color combo the best so far. I intend to try a red spinner, but I am pretty confident nothing is going to beat a chrome spinner!

We have recently shot a lot of video of this plane and have been so backlogged that I have not had a chance to update the blog. This has been such a good flying airplane that has been so much fun to fly that I wanted to share the artwork we've done, and of course, video updates.


My brother from another mother, Manta, is in town, and he shot this great sunset video of the red Extra EXP. This was Manta's I-Phone, and I think it did a very reasonable job. I had to lighten the video considerably because most consumer video cameras don't do well in low light conditions.


Finally, another buddy caught this on his I-Phone, so clearly if you need a camera and a phone, this is probably a decent choice.