Search This Blog

Tuesday, September 17, 2013

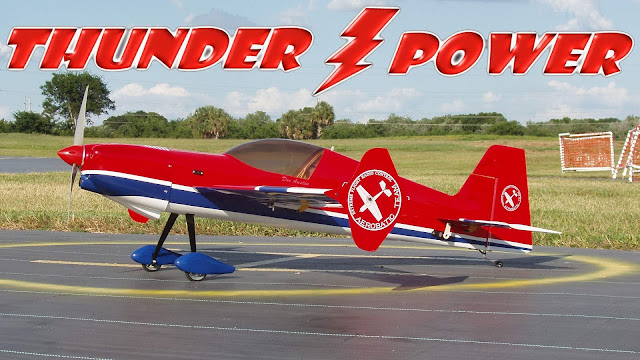
48" MXS__Maximum Xtreme Sickness


My solitary red MXS has been hanging on the ceiling for over two years because I have had so many other great EXPs to fly. Of course, I also flew a few of the blue MXS too, but the red has always been a special plane for me. I guess I was saving it, but now that I have a back up, I hope to get out with this plane much more often.

My first red MXS and I survived a heart attack together. While I was in the hospital I couldn't wait to get out of there so I could go home and order another one! Unfortunately by then, they were out of stock, but that just led to my first Extra EXP.

Most Extreme
All of the EXP series planes share a lot of flight characteristics. They are all designed to do achieve the same thing, which is extreme aerobatics, so the differences are all fairly subtle, and I fly them all pretty much the same way.

Except the MXS, that is.

What separates the MXS from the rest is that it is designed to fly even more extreme aerobatics than the rest. The moment (the distance between the wing and the horizontal stabilizer) is the shortest of all the EXPs, and at the time of it's release, the MXS had the largest elevator.

If you add the Dubro heavy duty servo arm on the elevator, you can get over 90 degrees of deflection. I use the second from the outside hole on the Dubro arm and crank my end points. That will give me about 88 degrees of throw, and believe me, when you yank on the elevator the MXS delivers.


The design of the MXS coupled with all that throw gives it nearly obscene pitch authority that makes for spectacular wall and parachute maneuvers. Most planes will climb a little when you pop them up into a wall maneuver. The MXS, however, rotates so hard that both wings stall instantly, and the plane will stand up on it's tail and actually sink toward the ground. I have bounced the MXS off the runway with the back of the rudder a time or two doing my walls a little too low, and I have to remember to start the wall higher than I want because it's going to drop some. That, and lately I have started adding power to arrest the sinking.
 
 
As you can well imagine, this means you have to fly the MXS a little differently, but it is not scary or anything. It's just different and after a flight or two you get used to it. I've found that I get the most out of the MXS when I dedicate myself to the plane and fly nothing else. I can jump around to the others with no trouble, but the MXS is another level of extreme and you have to fly it that way. 


Most MXS pilots love the plane for it's tumbling ability. The plane does lovely snaps and I've been working on a double snap, turning the plane 180 degrees from direction entry and coming back in an elevator. It's just a turnaround move and the MXS looks really lovely doing them.

Inside and outside snaps are very crisp, though with all the elevator throw you get a cleaner maneuver using about half the travel. There is so much pitch authority that if you use it all in a snap the plane will rotate so hard that it will turn itself out of it. It will just sort of look like it is wallowing through, but if you work on your snaps you'll get the timing right and the elevator movement will become natural. All 3D planes are like this in that they snap better without using so much elevator, but the MXS is a little different because it's elevator is so much more effective that you use less of it in a snap.


The MXS' big surprise is that for all of it's violence, the plane is still  very, very capable of buttery smooth precision work. You can see my big sky stuff looks very nearly as good as what I do with an Extra. Even with all that pitch authority, the MXS still has a big enough fuselage, fin, stabilizers, and SFGs to generate lift for good 3D, and locked in grooving at high speed.

I hope to be doing a lot more with the MXS this fall. There are so may good EXPs that it is hard to just take one of them and fly it extensively until you learn all it's intricacies.  I wish I could pick one and stick with it for awhile, but I just like all of them too much for that.        
 
Bonus Footage!   
Below is some footage from last year that I edited before with Windows XP Movie maker, and I have since learned that's a very low resolution editor. After re-editing with Windows Seven, it turns out this was HD footage and it is much, much better than before and worthy of a repost.

These were all taken in either blindingly bright conditions, or in near darkness, but they are still beautiful. You just need to turn off the lights to get the best viewing. The sunset video is especially pretty, but you will want to watch that one in a dark room so the colors will come out better. 


Tuesday, September 3, 2013

Edge EXP__Tweaking The Night Set Up


After a reasonably successful pitch black night test, I wanted to make a few changes to the way I mounted the light bars of my Aurora Genesis light system. If you have seen the video you'll remember how well the SFGs were lit up, which just showed how much light they were blocking from getting on to the airplane.

Also, the wires came out the end of the wing, where I taped them down on the SFG to keep them from flapping. This made my OCD go totally ape and I wanted to find neater way.


When I first inquired about the system, I spoke to Alex at Aurora RC and he suggested notching out the tips of the stab and mounting the rear light bars there. It did not occur to me at the time that I could do the same thing with the lights on the wing, but when brainstorming how to mount the wing lights in a neater way, I remembered this.

I really hated to cut out the notches on the wings of a brand new plane, but they are not so bad. I had to be careful to do a neat job, and also to get the notches the right depth. The idea is for them to bottom out in the notch and for the outsides of the bars to be flush with the outside of the wing tip


Once the wing was notched, I pushed the light bar into the notch and bolted the SFG down over top to hold it into place. This is a very elegant solution to mounting the lights. There are no wires hanging out, and no aero knots and light bars sticking out in the breeze.  Because of where I notched out the wing for the light bar, the wires go straight into the wing and from the outside you can't see a single wire. It's just very, very clean.


This arrangement resulted in some really important improvements beyond cleaning up the aesthetics and getting more light on the plane, though I feel much, much better now that I have a clean installation.

Now with the light bars tucked almost up against the inside of the SFG, they will create much less turbulence and upset the plane's aerodynamics much less.  Also the wires now go straight into the wing instead of on the outside of the SFG. When you remove the aero knots on top of all of this, the airflow around the SFGs has been cleaned up enormously. There was a lot od stuff out there messing up the airflow, but now it's righteously tightened up.

Because I no longer have to worry about the SFG blocking the light, I can go back to the lighter and larger original size EXP style SFG. The plane flew fine with the smaller SFGs, but I still missed having the KE lift and yaw authority afforded by the full size versions.

I save weight by losing the aero knot mounting points and the heavier plywood SFGs. Losing weight is always really good.

Because I mounted the lights further forward, along with losing the aero knots, and that moved a lot of weight that was previously behind the CG to right about on top of the CG.  Right now I've got my battery all the way forward in the radio compartment and the plane flies dead neutral. I generally like them a little forward of that and I think this will get it dialed in dead on.

Lastly, you'll notice on most planes when you hit an SFG on the ground it grinds  the bottom of the SFG near the rear. The way I had the lights mounted before, that's right where they were, and they were very vulnerable in that position. Now they are well past mid cord forward, and hopefully a little safer from ground strikes.

You can see how much better the light now hits the plane. We're going to try really hard to get some footage Thursday night, but it all depends on getting one of my camera guys to come out.


You know, this improves and corrects so many things that I feel a bit silly I ever did such a sloppy job the first time. I'm actually a little bit embarrassed by it, but that's what happens when you do LIVE reports. Sometimes people see your warts.

I knew from the beginning this was going to be a learning process and I would probably screw it up. With this in mind I was very careful not to do anything that I couldn't simply unbolt so I could change it. I notched the wings as a last resort, but again, it's not so bad.

If I ever want to convert the plane back to day use, I can cut a small piece of red 3M High Performance Vinyl out and slap it over the notches. The stuff goes down and sticks so well, and the seams are so close to invisible that I can live with it.

Just for reference, here is the mess that I made for myself before. Every so often my aileron trim would change, so I either had a poor centering servo or the wires were moving around and disrupting the airflow. The wingtip creates the most turbulence of the entire airframe, so you don't want any loose stuff out there.  I checked the servos over and over and they are fine, so getting everything out of the airflow seemed to be the next logical step.

You can also see how far behind the CG the light bar and it's mounting pieces are.

That, and it just looks like crap. When I was building the plane in my mind it did not look this messy, but once I paid the money to get the SFGs custom laser cut and ran all over town looking for aero knots, I was going to at least try the damm things!


I was also getting some wing rock, which I have never, ever, ever seen on an EXP, especially not on an Edge EXP. Since I have never ever seen that kind of thing on one of these planes before, the only possible cause simply has to be all the junk hanging off the wing tip, so cleaning all of that up was essential.

Another nice touch is that by going back to the original, full-size EXP style SFGs, I can run my cool new Sphere Of Doc Austin decals.