Search This Blog

Saturday, January 31, 2015

Edge EXP__Slo- Mo Theatre


It's been a while since we put out any slow motion videos. While we don't have a slo-mo camera any more, you can get the same effect with editing software, only it seems the resolution suffers. When I switched from Windows XP to windows Seven, the resolution and quality of my video took an enormous leap, so I figured slo-mo would work better on Seven too.

Using Windows Seven Movie Maker I cut the film speed in half (0.5) and the results were much better than I was expecting. Resolution still suffers a little, but the overall quality is more than acceptable. It's not as good as full speed in good lighting, but considering the conditions I am pleased enough.


We have had an unusually nice January in Florida. In fact, so far there has only been one or two days that I have actually had to wear a jacket at the field, and most of the time it's been in short sleeves too. As a result we have been flying a lot, and every day we have had beautiful, blazing sunsets. We generally get nice sunsets at SPARKS, but this year it's really been out of the ordinary.

This is my favorite time to shoot video because it just feels right. A nice flight is the perfect way to end the day. Usually by that time of day all the traffic on nearby I75 (which you can see in the background toward the West) has thinned out and it is not so noisy, and if you put in a good flight it can be a soulful experience.

When watching video, when you have more time to actually watch what's going on instead of flying the plane, you can see subtle little things like the light moving around on the plane when you turn or tumble. With the sun behind the hill, the plane is moving in and out of the shadows. You have to be careful to maintain orientation, but it's very rewarding to put in a good flight.

If the light hits the plane the right way you can get little reflective flashes off the covering and sometimes a little sparkle or two. Visually, it is downright beautiful. Once you throw in the slo-mo effect and a soulful soundtrack, you end up with an eerily beautiful presentation.


Edge EXP Another Endless Sunset In Slo Mo from Doc Austin on Vimeo.
 
In slo-mo, you can also see some really interesting things in the airplane's behavior. In the second clip I turn the airplane really hard on the rudder right as I popped it into a low level wall maneuver, and you can see the plane spins around so fast that for an instant it is actually travelling backwards. In another maneuver I am inverted and push down elevator really hard. the plane rotates as it arcs up and for a brief instant the wings and fuselage are level with the ground, but the plane rising straight up. Mostly in slo-mo you can clearly see how the plane is sliding around like a car on a wet road, usually not pointed in exactly the same direction it is going.
 
Also in tumbling maneuvers, it is interesting to watch how the plane goes into and recovers from a stall. The Edge is so solid here that it is not as dramatic as with other planes, and in fact it is in slo-mo that you get the best view of how rock solid the plane is all the way around. Slo-mo gives away and exposes little mistakes because you have time to see them better, but with the Edge you notice how stable it remains more than anything.
 
I learn a lot about 3D flying just by studying the plane's behavior in the light of critical slo-mo. It also helps me pinpoint some of the things I am doing wrong and helps me improve my game.
 
Both of these videos were shot in regular speed and then slowed in editing. A five minute flight gives you 10 minutes off footage to work with, and you end up cutting out a lot of straight line and climbing/diving flight. You end up with constant action and very little of the just flying around parts. 
 
While we have been shooting so much, the video has been stockpiling up and I've got to get it out before I get backlogged. This video is not slo motion. It's actually the full speed version of the second slo-mo video. You might find it interesting to compare the two.  


We have done so much with the edges lately that I think we need to balance it out a little with a Yak EXP sunset slo-mo video. This video was previously titled "Hell Yeah," and you can see how much different the slo-mo treatment makes everything look.


Yak EXP Red Skies Slo-Mo Set Up from Doc Austin on Vimeo.


And, while we are at it, let's not leave the awesome 64" MXS out of the slo-mo mix....


MXS EXP Slo - Mo At Sunset from Doc Austin on Vimeo.

Thank You Extreme Flight And Thunder Power
We are going into our eighth year with advanced Energy's Thunder Power brand, and they have been a most wonderful partner. They don't put any demands on me and always make sure I have what I need to do the job.
 
Looking back to 2008, this is when I first started representing Extreme Flight through the Torque and Airboss brands, and in 2011, I became a full Team Extreme member, so we are celebrating a lot of years with those nice folks too.
 
There is no way I could do the things I do without their support, so they are the ones that make it all happen and I could not be more grateful.
 
With all of these companies, I was a customer long before I became a representative. I came to represent these companies strictly because I had such good experience with their products and customer support. I believe in these companies, these people, and these products, and I certainly don't mind saying so.
 
Looking forward, we will be improving our relationship with Hitec RCD, and you might even see me flying an Aurora 9 or Flash 7 radio later in the year. Like any good relationship, this is taking time, but it is better to move slowly, and to build trust and respect solidly. Hitec servos have served me really well, and their customer service has been unparalleled. We have a good, if unofficial, relationship, and I see that only getting better.


Thursday, January 29, 2015

Extreme Flight 48" Edge EXP__Rediscovering The Classic

 
With so many great EXPs to choose from, it was inevitable one of them would suffer some neglect. The Edge was the second EXP to hit the market, and as such mine have been a little overlooked while I discovered the latest and greatest EXPs. Still, the Edge has always been a classic and the EXP has not suffered against the others in the flying department.
 
If anything, as I try to improve my post stall (3D) game, the Edges have recently become more of my go-to plane, simply because they are the most stable of the lineup in post stall. The straight leading edge of it's wing nearly eliminates any wing rocking in post stall harrier flight, and elevator manuevers and such. When you don't have to chase the wings keeping them level, 3D becomes much easier. The Edge is often called "The Harrier King," which I think is pretty spot on.
 
This is why the Edge is widely regarded as the best plane to use for 3D training. Harrier flight is the building block for learning 3D, the cornerstone of the foundation. To work on harrier flight you need a plane that is so solid in harrier that the pilot spends his time learning instead of fighting the plane. The Edge is that plane.
 
Whenever I help someone get into 3D, I do my best to get them into a 48" Edge EXP, simply because they have more success that way.


The other side of the coin is that the Edge gives up very little in the precision department. I especially like this plane for four point rolls, which doesn't really make sense since the Extra does them a little better. Maybe the Edge just looks good with it's leading edge pointed straight up and down on the KE part of the point rolls. Presentation is everything, and that straight edge presents well in KE flight.
 
The Edge also does nice snaps and spins, though not quite as neatly as the other EXPs with their triple tapered wings. You give up a little precision to get stability, but the tradeoff still leaves for plenty of both attributes and you have a well rounded package. Mostly I love the Edge because it is so smooth, stable and easy to fly. I especially like the Edge when I want to fly hard and loose because it's stability has saved me more than a few times.
 
I have written a considerable amount on the Edge EXPs in both 48" and 60" sizes, and you can find all of that on this blog. You might have to dig a little, but I've included set up photos and notes as well as some set up tips.
 

Edge EXP EPIC from Doc Austin on Vimeo.

Slow motion videos are always fun. Here I took some previous footage and slowed it to 1/2 speed. The footage looks completely different in this speed, and the sunset sky is even more spectacular. This video literally explodes out of your monitor.


Edge EXP Slo Mo Huckola from Doc Austin on Vimeo.
 
 
My two current Edges are proving to be solid performers. The first one has an interesting history because it was a perfect build. The plane literally fell together with almost no effort and came out so well I was actually for once pleased with my own work.
 
That's why I was so furious with myself when I crashed it upside down on the runway and ground off the top of the rudder, SFGs and canopy! Fortunately that was all of the damage and I was able to buy the replacement parts. Instead of replacing the Team Extreme decals, I had some Team America World Police decals made up and you can see that below.


Edge EXP More Cheating from Doc Austin on Vimeo.

Obviously I was pleased to be able to save it, and it still looks like a brand new airplane. This is the plane you see in the videos above.
 
When I had to opportunity to secure some Hitec HS5070 high voltage servos, I wanted to start with a new platform instead of retrofitting an existing one. Since I only had one Edge at the time, this served the dual purpose of also getting a back up Edge set up.


For this plane I went minimalistic on the graphics because I did not want to clutter up the scheme. I flew the plane for a few weeks with high voltage servos, but needed those servos for an MXS. I have since converted this plane back to standard 6 volt servos and it flies fine. Since I tend to fly the Edges slower and take advantage of it's sterling post stall stability, I will probably continue to fly them on 6 volt servos. I've been flying these servos and power system on all my Edges since 2010, and besides a stripped rudder servo or two, the combination has been bulletproof in everything except a full on crash.
 
As you can see, I flew the thing really hard with the 7.4 volt servos and the plane was incredibly locked it. I wanted to really hammer it hard and showcase the servo's speed and torque. As a result, this is one of my few videos that I am actually pleased with.


After this flight I did a rethink on my Edges and vowed to fly them more. They may not be the latest and greatest airframe going, but they are every bit as potent as the newer releases.  In it's own way I think the Edge EXP is as complete of an airplane as my beloved 48" Extra EXPs. Their performance bias is just a little bit less toward precision and a little more towards 3D.  Both are good to have, but for hardcore 3D the Edge EXP has few peers. 
 
Finally
It has been an absolutely crazy year for me, so it was good I had these surefooted Edges available to fly while I was not so sure footed myself.  I am almost fully recovered, and grateful to Extreme Flight for giving me the motivation to get off the couch and back in the game. Having something exciting to do really helped me fight through the process of healing

I promise I will be better centered in 2015 and we hope to have our biggest year yet.

This is a slightly older video of my 60" Edge that I never published on the blog. I guess I put it on RGC and forgot about it.
 
  
BUTWAITTHERE'SMORE
Also of great value to my recovery process was the time I spent with my Twisted Hobbys foamys. I was able to fly these in my front yard well before I could drive to the field to go flying. As a result, I probably flew them too soon because pain killers and flying is a bad mix. I totally trashed a brand new Crak Laser in a handful of weeks, but it was worth it. In a way, that plane got me off the couch and moving around when it would have been just as easy to give up. It sort of saved my life.
 
I did kind of luck out recently in that a friend was selling his 32" Edge, and it did not have a mark on it. It was built beautifully and flies very, very well. It's a little less agile than the Crak Laser, but it's still really good. I will probably always have at least one twisted plane in the fleet.

I gave the Laser to a friend who put a receiver in it and another friend fixed it up. It's become sort of the community foamy beater, and everyone flies it. Everyone owns a piece of it so everyone gets to hammer it. Combined with what I had already done to it, this plane has survived incredible abuse and still flies well enough to be fun for everyone.
 
Here is my new Twisted Edge flying at our secret testing location in..... well, that's secret. I'm using this plane to get some stick time  over tall grass and try some new moves. This will transfer over really well when I try it on bigger planes. The mind learns better if you start off slow and easy and then speed things up with more intensity. A foamy is good and slow and easy, with little repercussions for getting it wrong, especially over tall grass.

So, here's a special thank you to twisted Hobbys for marketing such a fun and fine performing product.


Monday, January 12, 2015

Laser in High Voltage


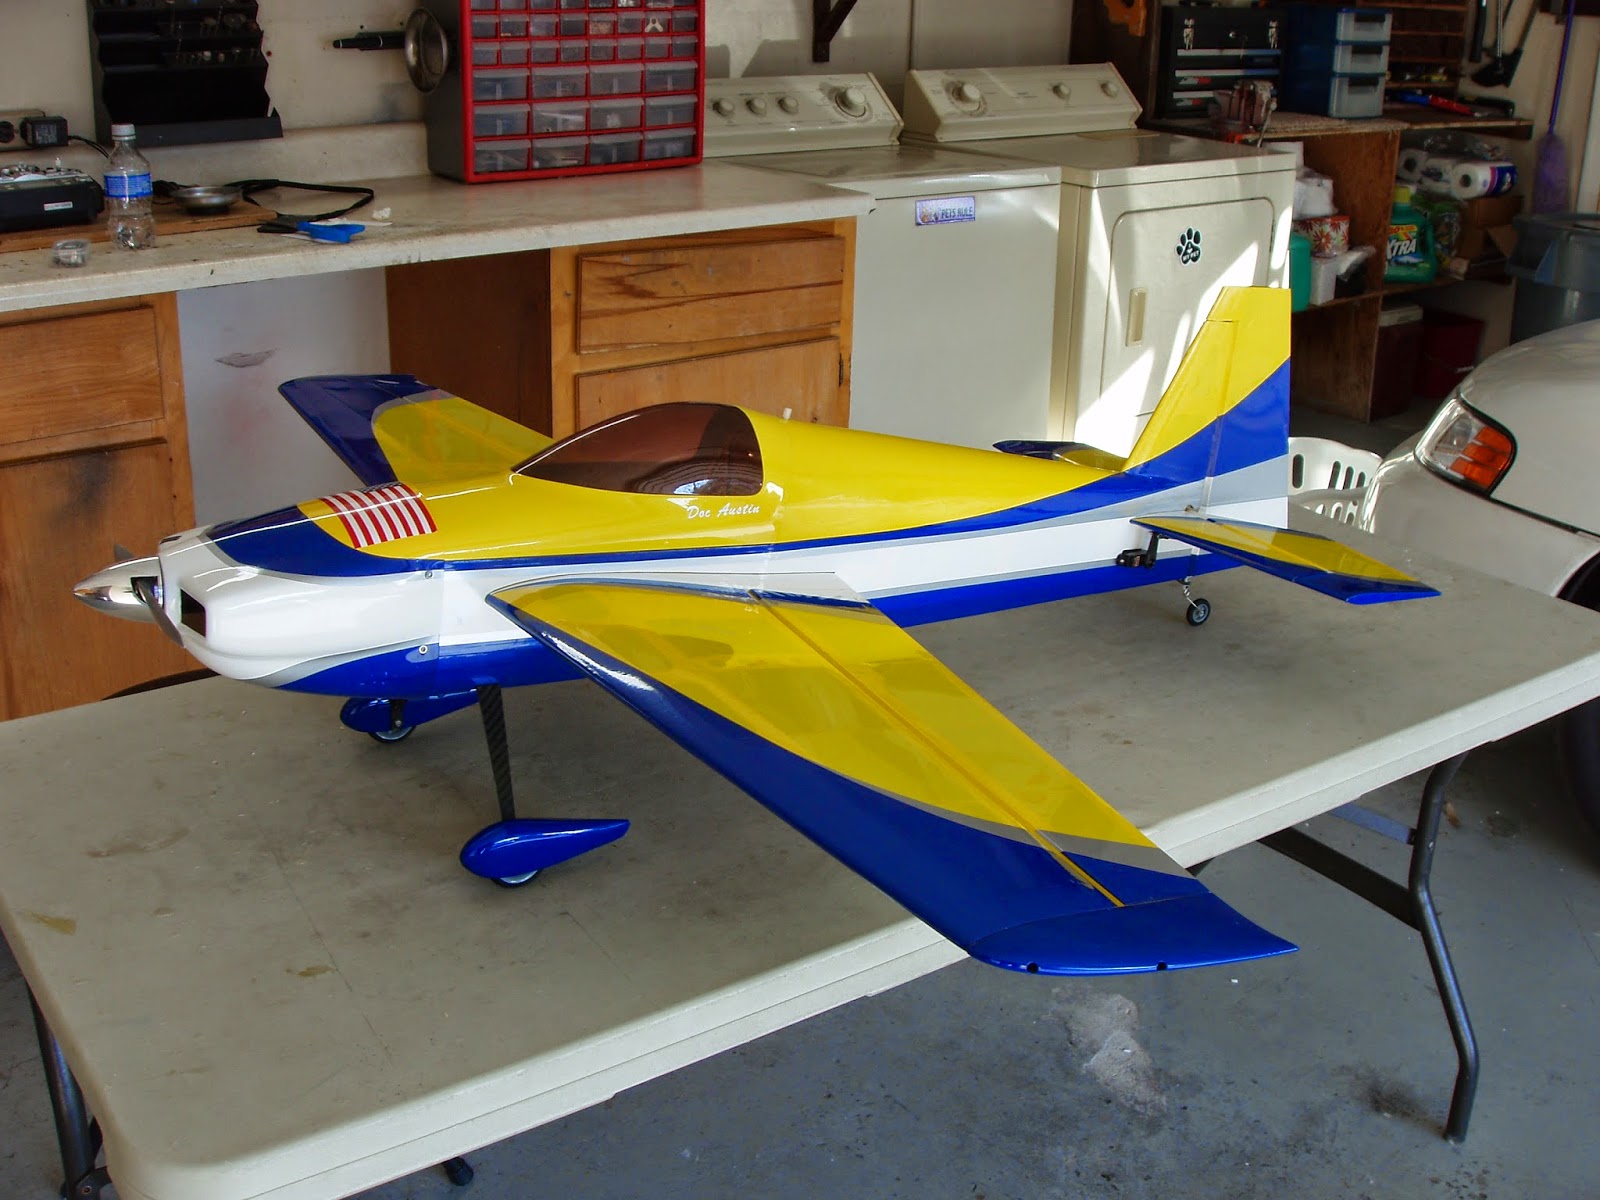
I enjoyed the Laser Sport Project so much that it made me want another yellow one of my own. With the MXS racing wingtips, I fell in love with this plane all over again. I am planning to fly the plane with and without the tips, and maybe with the tips and no SFGs because it looks so cool that way.

While I love the red Laser, it is sometimes difficult to see at SPARKS when the sun is in your face. Yellow works much better in those conditions, but if you get blinded by flying through the sun no color is going to help you.

More HV Servos
While my standard 6 volt Hitec servos are still working fine, I plan to use high voltage HS5070MH and 5087MH servos in any new 48" plane I build. All of my HS65MG and HS85MG servos are paid for, so I am going to use them up, but again, anything new gets HV servos. The standard servos work really well until you start using big deflections at high speed, and then the HV servos really come into their own. The Laser is also has a gyroscopic nature and tumbles really fell, so having more push in the control surfaces can only help that.

While building the Laser Sport, I trial fit my HS5070MH servos and they fit fine with no extra tinkering. This made it an easy decision to build my new Laser with 7.4 volt servos. I'm using the HS5070MH on the rudder and ailerons, and for the elevator I will again be using an HS5087MH. Of course, I had to cut the servo opening a bit to get the HS5087 to fit, but it's the same size case as the HS85MG. I've put HS85MGs on dozens of EXPs, so that's not a big deal.

The Build
First, you might notice how well my work area is now lit up. My friend, "The Mayor Of South Tampa" (as he is know on the collector car circuit) hooked me up with some really sweet florescent lighting. It's so much better now that I don't know how I ever put a plane together before. Thanks, Mayor!


I always plan to take lots of pictures and do a bit of a build thread, but then I always get engrossed in the process and forget. This time I am going to show you how I install the horizontal stabilizer (if I remember to take the pictures, that is). I have to explain this on RCG every so often and it's not easy to do without photos.

The first thing I do is glue the hinges into the control surfaces and after those are dry I trial fit the elevator to the stab.  I make sure the hinges line up and slide all the way in, and this is much easier to do before the stab is in the plane. I set the elevator aside for now and final hinge them after the stab is glued into the fuse.

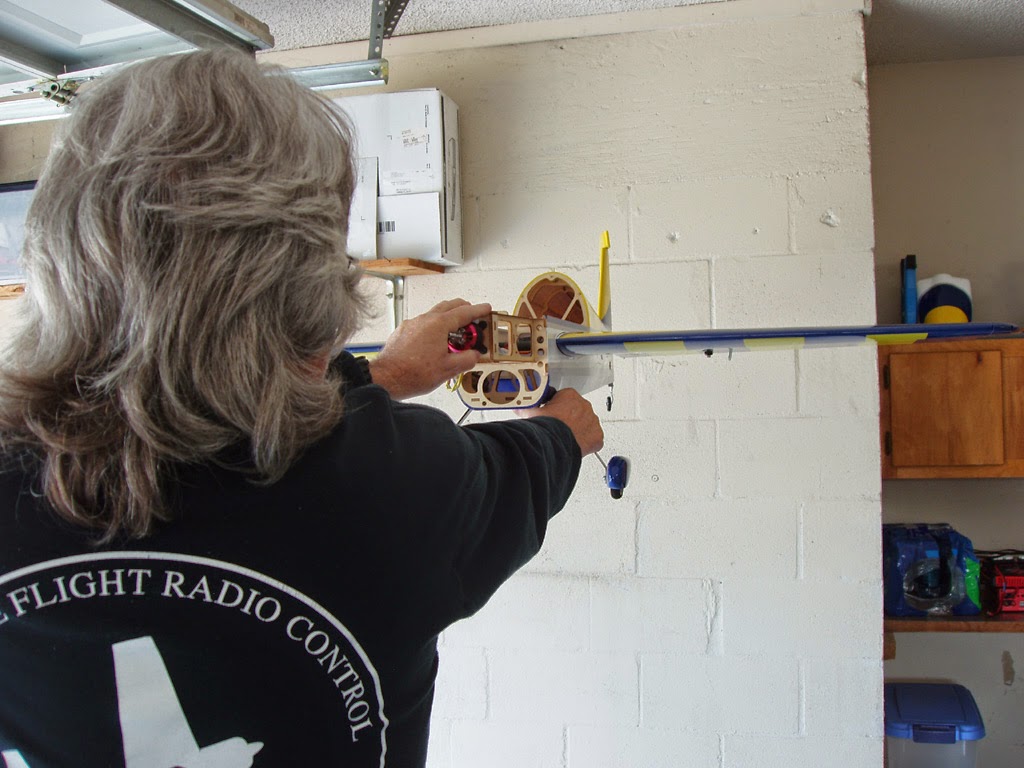
Then it's time to put the stab in. I put the wings on the plane and slide the stab in, then measure it side to side to make sure it is reasonably close to centered. I'll come back and get it dead on after I check to make sure the wing and stab are parallel to each other. I hold the plane up with a solid color wall behind it because with a solid color there are no distractions in your vision that can cause an optical illusion. With nothing else in the field of view it's much easier to see if the alignment is correct or not.


Here I sight down the top of the wing (one eye closed helps) to make sure the stab sits parallel to the wing. I have only had one or two EXPs be off here, and most times it is just a matter of lightly sanding the bottom of the high side of the saddle a little until the stab sits level. If it takes more than one or two passes with an Emory board then I will cut a piece of business card about 1/8 wide and slide it under the low stab. I have never had one any further out that that, and even that much is extremely rare.

Now I measure the stab side to side again, only this time I get it dead on. I also eyeball it to get it as square with the wing as I can, but I will measure it later.  From here I jam a long hat pin all the way through the rudder post (see photo) and into the back of the stab. This locks the stab in so it cannot move side to side when I square the stab to the wing. Once the pin is in, I measure again to be sure.


From here I measure from the wingtip to the stab tip, and adjust the stab as necessary to get the measurement the same on both sides. I check my side to side measurement one final time and then check the wing tip to stab tip over and over until I am satisfied it is dead on. Once that is done I hold the plane up to the wall again and make sure the stab is still parallel to the wing.

 
I absolutely torment myself getting this as perfect as I can possibly get it. This part and getting the hinges right are the most crucial part of the build.  If you screw it up the plane is not going to fly right. Certainly you can get away with it being off a little, but nothing flies as good as a dead straight airframe. Everything else is either easy to redo or live with. If you mess up the cowl spacing it's not going to make the plane fly badly, but getting the tail crooked will.

Once I am absolutely dead solid sure the wing and stab are parallel, the stab is centered in the fuse, and also square with the wing, I run a bead of thin CA into the top of one side where the fuselage and stab meet. I let that set up for about a minute and then pull the wings, set the fuse aside and find something else to work on for about 10 minutes. Then I do the other side, wait 10 minutes, then flip it over and repeat the process on the bottom of the stab.

After about an hour all the CA has set up and it's safe to handle the plane. I pull the pin out cut out the rudder post behind the elevator. I forgot to take a picture of that, so here's one of my Yak. I cut the post out with a hobby razor saw that makes nice clean cuts, and all I do from there is seal the edges back down with a trim iron.


 Now we can hinge the elevator and rudder, but I will save that for the next build log, which will probably be a 60" Laser in the same color scheme.


Pilot
One of the cool things we did in the Laser Sport report was put a pilot in the plane. This is the replacement for the pilot that comes in the FMS 50" Extra. You can get it from Motion RC part number FMS Pilot 011.


Here I mount an FMS pilot on some 3/16 balsa that I painted with Testors black dope. The balsa simply glues to the canopy frame on the inside. I had to spread the canopy open a little bit on the bottom to get the block past the canopy frame rails, so you will have to cut the block a little narrower than the inside of the canopy. I think mine was 5 and 3/4" wide. Best bet is to trial fit the block before painting or mounting the pilot. When final mounting the assembly, medium CA gave me plenty of time to slide it into place. Just make sure you let it set up for an hour and then lightly hit it with CA accelerator (kicker) before you put it on the plane. You don't want to risk it having the canopy glue itself to the fuselage!


Something about the Laser canopy really cries out for a nice pilot. The FMS pilot looks great, but it is a bit heavy. It would be great to have a nice lightweight Pilot X for 48" plane, so let's hope Extreme Flight makes one soon.

Racing Tips
The figerglass racing wingtips from the 48" MXS fit perfectly on the Laser and are a perfect match for the color scheme too. The rest of the Laser is racey enough looking that the tips look like they were actually made for this plane. As far as the effect these have on performance, I flew them extensively on a 48" Extra and you can read about that on Flying The Extra EXP With MXS WingtipsI've also flown them on a Laser and they had much the same effect on that plane as they did on the Extra.

I'll be trying the laser with and without the tips, and probably with just the tips and now SFGs..


 I also recovered the blue SFGs that came with the kit, again in yellow. You can get the decal from B and E Graphics. It's a copy of the decal that came with the red/white/dark blue 48" Yak.

 
Here are some experimental tips I had left over from another project. I like the looks of these because they don't visually dominate the wing tips as much as a full sized SFG. 


Set Up
Nothing has changed since I last built a Laser except I am using HV servos. I use the standard arms that come with the servos everywhere except the elevator, which uses a Hitec long single arm from the #PN45509 set.


 Battery Position
Using my customary Thunder Power 4S 2700 70C Pro Force battery, here's where it ended up. The weight of the pilot is behind the CG, so I had to move the pack forward a bit to compensate.


FLYING
 
 
The Hitec HV servos really shine at high speed. At 7.4 volts there is enough speed and torque that stalling is no sort of issue at all. As such, the plane enters snaps and tumbles with instant full deflection, and this amplifies the violence. Like I say, the Laser has a gyroscopic nature anyway, but now it is even better. For moves like a blender, you are getting absolute full deflection, so the plane rolls into it at a high rate, and then spins more violently because the controls peg before the plane loses any momentum. We've already seen with the HV MXS that the additional servo torque pays a big dividend when doing pop tops because a little extra control movement helps carry the momentum all the way through the maneuver.

Having now set up three 48s with these servos, I believe we were getting some stalling with the 6 volt servos and just got used to it. That does explain why I was burning up so many potentiometers in my servos, and hopefully that negative is a thing of the past. Better reliability will surely result from this, and that alone makes the price difference worth it.

Mostly, though, this plane is still a Laser, though a better one. All the good things I have loved about this plane are still the same, if not a little better in certain aspects. In general it seems a little crisper all the way around. It was tough to improve what we already had, but Hitec took things to the next level with these servos.

Video
We did manage to get one quick clip, but the wind was so bad that it blew the sound track completely out. For now I killed the video sound and put some music over it, but we hope to get some good video soon.


STORAGE